
Mailchimp is one of the most popular email newsletter platforms on the web. Fortunately, it’s easy to build Mailchimp signup forms in WS Form with the Mailchimp add-on. In this article, we’ll look at how to create a Mailchimp signup form both manually and automatically. We’ll also see how to populate the forms automatically for users that are signed in.
Getting Started with Mailchimp

First, you’ll need to download and install the Mailchimp add-on. Then, you’ll need to connect the add-on to your Mailchimp account.
The Mailchimp add-on is included with the Freelance and Agency editions of WS Form. You can purchase the add-on separately for $19 per year on the Add-ons page. You’ll see the installation and Mailchimp connection instructions in the WS Form Knowledgebase. Follow these instructions to get Mailchimp integrated into WS Form and then you’ll be ready to create Mailchimp signup forms.
Creating a Mailchimp Form Automatically

To create a Mailchimp signup form automatically, go to WS Form > Add New in the WordPress dashboard and select the Mailchimp tab.

This shows a list of your Mailchimp newsletter lists. Select the list you want to create a form for or click the blank form to start from scratch. I recommend choosing one of your lists.

All you need to do is remove or add any fields you want, save the form, and publish. The settings for the Actions are set up automatically, but you can modify them if you want.

Your automatically generated form will then be available in your Forms list. You can use the form within your pages, posts, and widgets.
Creating a Mailchimp Form Manually

You can also create the forms manually. In the WordPress dashboard, go to WS Form > Add New and click the Signup tab.

Hover over the form called Newsletter Sign Up. You’ll see buttons with options to use the template or preview the template when you hover over the form. Click Use Template.
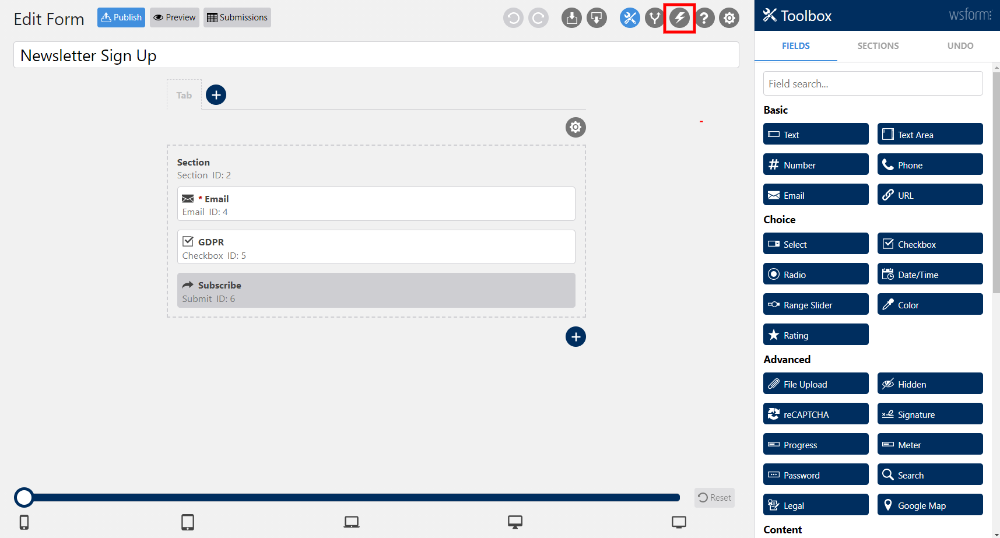
This opens the form editor where you can make changes to your form. Once you’re happy with your design, select the Actions icon at the top of the editor. This is the icon that looks like a lightning bolt.

You’ll see the list of actions in the right sidebar. It includes a few actions and a plus icon to add more actions. The standard actions include:
- Save Submission
- Show Message
- Send Email

Click the plus icon to add an action and then select Add to Mailchimp from the dropdown box that appears. You’ll need to have the Mailchimp add-on activated and connected to your Mailchimp account before Add to Mailchimp is an option in this list.
Mailchimp Settings

The sidebar opens a list of options for Mailchimp. Options include:
When Should This Action Run? Choose the run the action when the form is saved or when the user submits the form. Running the action on form submission is the default setting.
Mailchimp List – select your email list from the dropdown box.
Status – choose the status of the subscriber once they submit the form. Select from Subscribed, Unsubscribed, Cleaned, or Pending. Subscribed is the default setting.
VIP – this lets you choose if subscribers are VIPs when they subscribe. This is unchecked by default.
Email Type – choose the type of email between HTML and plain text that subscribers are signed up to by default. HTML is the default setting.
Opt-in Field – this lets you select which field on the form to use as the opt-in field. It’s best to add an unchecked checkbox for GDPR compliance. The default form has a GDPR checkbox by default. I recommend selecting that option.
Field Mapping

Next, you’ll need to map the fields on the form to work with Mailchimp. Once you select the Mailchimp list, a new set of options appear at the bottom. These options let you map the form’s fields and tag the members.

For the first option, Field Mapping, you can select the form field and Mailchimp field from the list or click the Auto Map option.

You can also select them manually from the lists. The first dropdown contains all the fields in the signup form.

The second field contains the Mailchimp options.

Click the plus icon to add more fields. Perform this step until you’ve mapped all the fields. This form only has one field, so you won’t need to add more.
Interest Mapping

Interest Mapping tells Mailchimp which of the fields match Mailchimp interest, or choice, fields. These are radio boxes, checkboxes, or any type of selection. Choose the interest field from the dropdown. In this case, the GDPR field is the only option. This is selected automatically if you choose Auto Map.
Tags
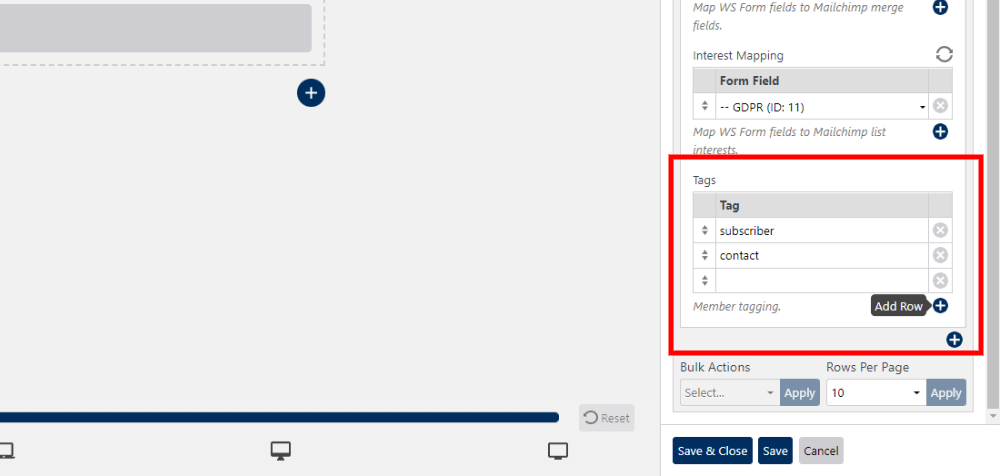
Tags are labels that you can use to organize your subscribers. You can add as many as you want to any signup form. If existing members use this form, any tags that are not already assigned to them will be added to that member. Tags are optional. To add them, click the plus icon and enter a tag into the field. Add a field for each tag.
Publish the Form

Once you’ve made your selections, click Save and Close in the bottom right corner and Publish in the upper left corner.

You can now use your Mailchimp signup form within your pages, posts, and widgets. This method works well and it gives you a lot of control. If you want an even easier method, you can create your Mailchimp forms automatically as we saw in the previous section.
Auto Populating Fields

WS Form with the Mailchimp add-on can automatically populate the Mailchimp forms of any user that’s logged in with an email address that matches a Mailchimp contact. To set it up, select the gear icon in the upper right. In the right sidebar, choose the Data tab.
Under a section called Populate, check the box labeled Populate Using Action. Under Action to Populate From, select Mailchimp and choose your email list from the dropdown box labeled List to Populate From. Map the fields, add your tags, and save your form.
If you’re using a form that’s automatically generated for Mailchimp, the list will already be selected, and the fields will already be mapped.
Ending Thoughts on Creating a Mailchimp Signup Form with WS Form
That’s our look at how to create a Mailchimp signup form with WS Form. The Mailchimp add-on makes it a simple process. Easily create them manually or automatically. Following a few simple steps, you can add a custom Mailchimp signup form to your WordPress website and start building your email list within minutes.
We want to hear from you. Have you created a Mailchimp signup form with WS Form? Let us know about your experience in the comments.
