WS Form has a number of WordPress filter hooks that can be used to dynamically change the settings of the Send Email action.
In this tutorial we’ll show you how to allow a user to select a recipient using the wsf_action_email_to filter hook.
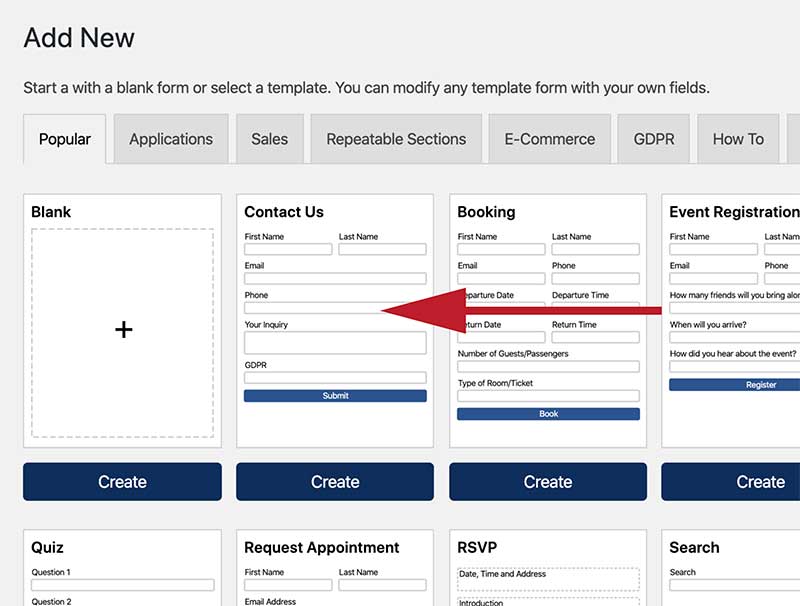
1. Create Form
For the purpose of this tutorial, we’ll create multiple recipients for a Contact Us form. To create a quick Contact Us form:
- Click on Add New from the WS Form administration menu.
- Click the Contact Us template.
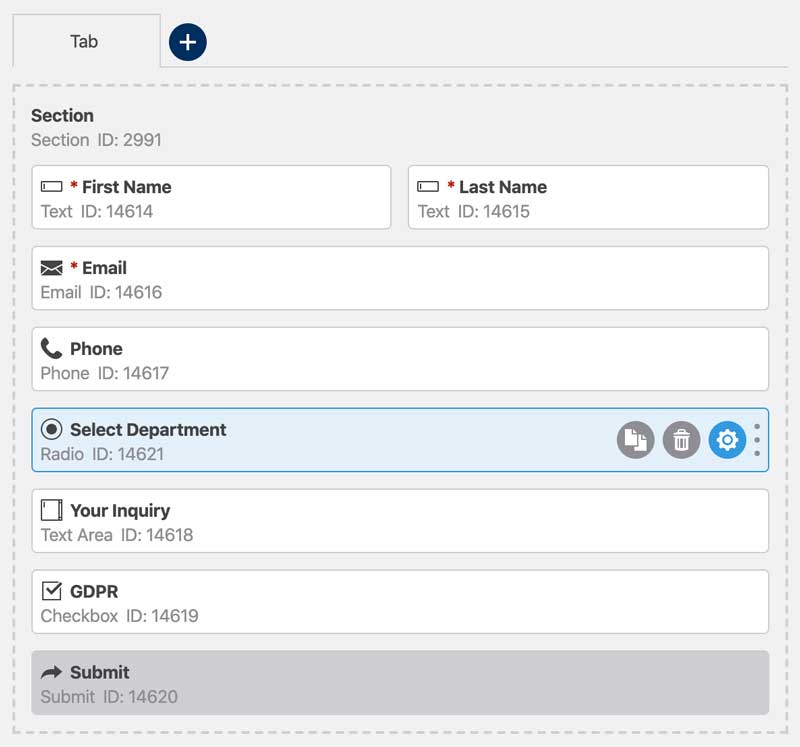
2. Add Radio Field
Once you are in the layout editor, we are going to add a radio field to the form that will be used to select the recipient. You could also use a select field if you wish. To do that, we simply click or drag and drop the Radio field from the Build sidebar. We’ll give that field a label of Select Department, but you can label it anything you wish.
3. Configure Radio Field
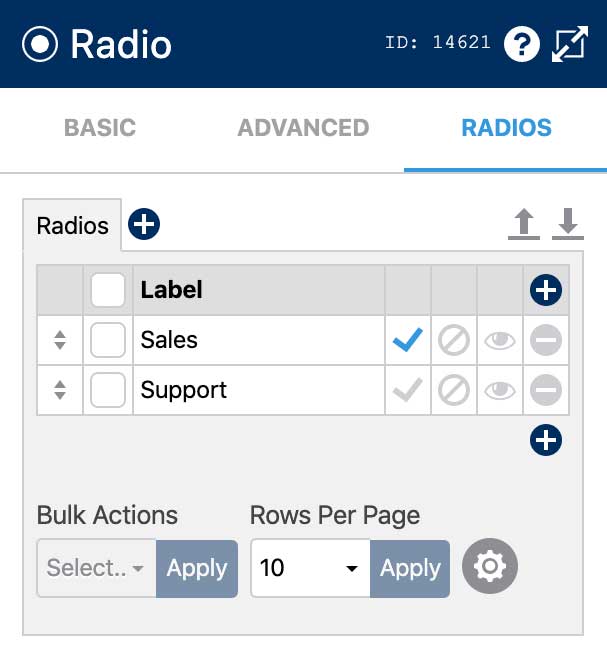
Next we need to configure the radio field with the departments we want to allow the user to choose from.
- Click on the settings (gear) icon for the Select Department field.
- In the sidebar, click the Radios tab.
- Remove the sample rows and then add as many rows as you need for each intended recipient. We’ll add Sales and Support in this tutorial.
- Click the checkmark on the first row to ensure the first row is checked by default. We need to do this to ensure at least radio is selected. Another option is that you could check the Required checkbox in the Basic tab to ensure at least radio is checked when the form is submitted.
- Click Save at the bottom of the sidebar to save your changes.
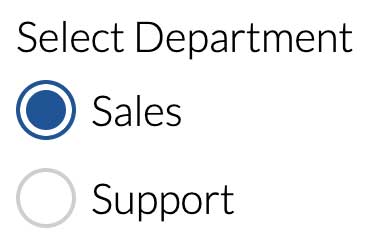
If you preview the form, it will now display two radio fields that allow the user to select which recipient they would like their inquiry to go to.
Next we need to ensure we have a Send Email action set up for the form.
4. Set Up Send Email Action
To access the form actions, click the Actions icon at the top of the page. This will open the Actions sidebar:
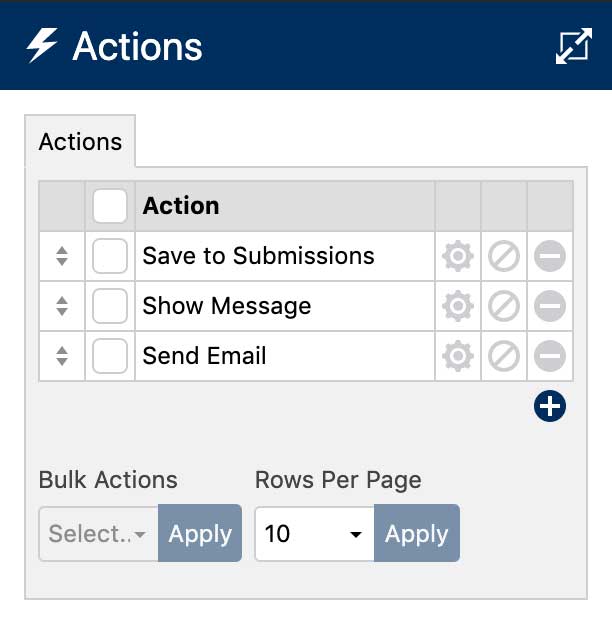
Because this is a new form, we should already have a Send Email action. If a Send Email action does not exists, you can add one as follows:
- Click the add icon below the action list to add a new action.
- Select Send Email from the Action pulldown list.
Set up your Send Email action with your desired From address Subject Line and Message. You can set the To address to #blog_admin_email, this will ultimately be changed by the WordPress filter hook.
5. WordPress Filter Hook PHP
The last step is to create the WordPress Filter Hook function in PHP. This would typically go in your themes functions.php file or code snippet plugin.
An example code snippet can be found below:
// Callback function for the wsf_action_email_to filter hook
function wsf_action_email_to_hook_function( $to, $form, $submit, $action ) {

    // ID of form this filter hook applies to
    $form_id = 123;

    // ID of field
    $field_id = 123;

    // Check form ID
    if( $form_id != $form->id ) { return $to; }

    // Build meta key containing the field value
    $meta_key = sprintf( 'field_%u', $field_id );

    // Get field value (Will be an array of values for a select, checkbox or radio field)
    $values = wsf_submit_get_value( $submit, $meta_key );

    // Check field value
    if( empty( $values ) || !is_array( $values ) ) { return $to; }

    // Field value to email address lookup table (Build this data using your own code)
    $to_lookups = array(

        'Sales' => 'Sales <sales@mysite.com>',
        'Support' => 'Support <support@mysite.com>'
    );

    // Return array
    $to_array = array();

    // Process values
    foreach( $values as $value ) {

        // Check if lookup exists
        if( isset( $to_lookups[$value] ) ) {

            // If it does exist, add this email address to the return array
            $to_array[] = $to_lookups[$value];
        }
    }

    // Return value
    return count( $to_array ) ? $to_array : $to;
}

// Add a callback function for the wsf_action_email_to filter hook
add_filter( 'wsf_action_email_to', 'wsf_action_email_to_hook_function', 10, 4 );
In this code example you would change the value for the $form_id variable to match the ID of the form you created. You also need to change the $field_id variable to match the ID of the field containing the recipient options.