This tutorial explains how we created the customizable t-shirt product demo. In this demo, the color of the t-shirt changes when a color field on the form is changed. This is achieved by changing the color of an element in an SVG file.
Demo
The tutorial requires:
- WS Form PRO WordPress plugin.
- WS Form PRO Product Integrations WooCommerce extension.
- tshirt.svg SVG file.
- tshirt.json form file.
Our WooCommerce demo site also feature text editing (not included in this tutorial). You can download the full t-shirt form file here: tshirt-full.json
The SVG File
If you would like to learn more about the SVG format, click here. You can create SVG files using popular vector software such as Adobe Illustrator or Sketch.
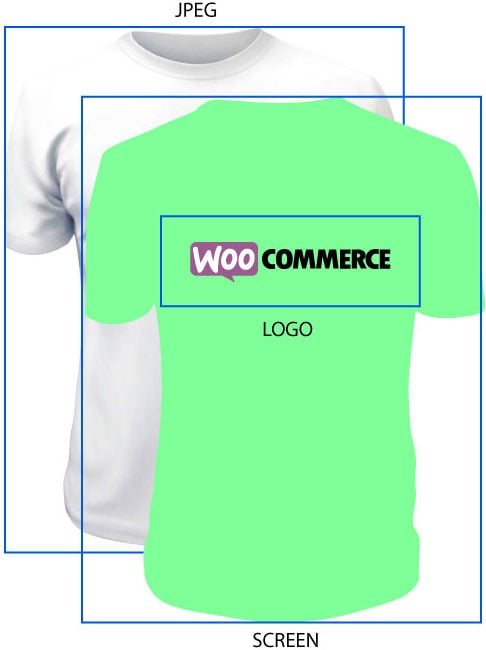
The tshirt.svg file has several layers that make the coloring effect possible.
- A JPEG image layer. This is an image of a solid white t-shirt.
- A SCREEN layer. This is the layer that the color is applied to that makes the t-shirt appear to be a different color. (Class: wsft-tshirt-screen).
- A LOGO layer (This later is optional).
Enable SVGs in WordPress
To enable SVG’s in WordPress we recommend using the plugin SVG Support. This enables you to use SVG’s as featured images in posts, pages and products.
You will need to force inline SVG. This will ensure the SVG is not output as an img tag and allows JavaScript to manipulate elements of the SVG.
To do this:
- Click on Settings then SVG Support in the WordPress admin menu.
- Check the Enable Advanced Mode? setting.
- Click Save.
- Check the Force Inline SVG? setting.
- Click Save.
Create The Form
- Click Add New under the WS Form menu.
- Click Blank to create a blank form.
- Drag the tshirt.json file into the layout editor to import it. Click Ok when prompted. (You can also use the Import icon at the top of the layout editor).
- Click Publish.

Creating The Product
To create the product:
- Add a product in WooCommerce.
- Enter a product name (e.g. T-Shirt Tutorial).
- Add a regular price of zero or greater (e.g. 10).
- Click on Set product image.
- Upload the tshirt.svg file.
- Click Set product image.
- Click Publish to create the product.

Assigning The Form To The Product
The next step is to assign your form to the product to customize it. While still editing the product…
- Click on the WS Form tab in the Product data section.
- Click choose an existing form.
- Select the Customizable T-Shirt Product Tutorial form you imported above.
- Click Update to save the changes.
- Click on the product URL to preview the product.

Test The Product
Click the product link to view the product. You should now find the SVG screen layer is updated when a color is selected.

How It Works – Conditional Logic
In order to change the SVG screen layer color, we use conditional logic in WS Form. Conditional logic lets you create interactive forms.
To view the conditional logic for the T-Shirt form:
- Edit the form.
- Click the Conditional Logic icon at the top of the layout editor. The Conditional Logic sidebar will open.
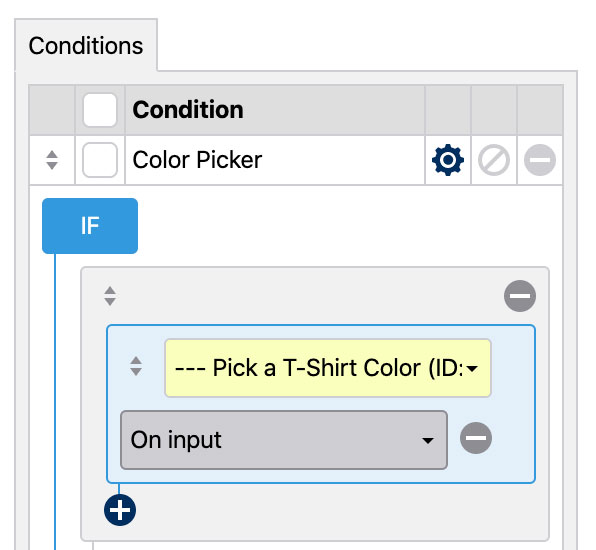
- Click the gear icon next to the Color Picker row.
Color Picker
The conditional logic for the color picker checks for On input (when a user clicks or drags the color picker) and Changed (when the color is changed by the user or another conditional logic THEN/ELSE statement) events on the Color Picker field.
The THEN statement runs whenever the color picker is changed. When a change occurs, the following JavaScript is executed:
$('.wsft-tshirt-screen').css({fill: '#field(612)', 'mix-blend-mode': 'multiply'});
This is a combination of regular JQuery and WS Form variables. The value of the color picker #field(612) (612 will be different in your form and is the field ID of the color picker) is used to set the CSS file property of the wsft-tshirt-screen class.
Commerce Color
The conditional logic for the Commerce text on the t-shirt checks the lightness of the Color Picker field.

If the lightness is less than 50 (dark), the text is set to white using the following JavaScript:
$('.wsft-tshirt-logo-commerce').css({fill: '#fff'});
If the lightness is greater than or equal to 50 (light), the test is set to white using the following JavaScript:
$('.wsft-tshirt-logo-commerce').css({fill: '#000'});