High converting forms are crucial for sales and marketing. A form designed with conversions in mind follows different design concepts than standard forms. In this article, we’ll examine what makes a form high converting and see how to build one with WS Form.
What Makes a Form High Converting?
There are many different types of forms. Regardless of the type, forms are a gateway to the user for both new and existing customers. The purpose of a high converting form is to generate leads. To perform its job, it must be designed with conversions in mind. Let’s examine a few concepts that will help make a form high converting.
Limit the Number of Fields
A smaller and shorter form is easier to use. Don’t ask for information you don’t need. For example, don’t include a field for a phone number if it’s not important for the conversion. The fewer fields the better.
Break the Form Into Smaller Pieces
Large forms can be overwhelming. Revealing a piece at a time can help the user stay focused. This can be done with a multi-step form, such as tabs or enabling one question at a time. Be sure to inform them of where they are in the process. This improves the user experience and increases the chances they’ll finish the form.
Keep it Above the Fold
Make the form a prominent part of the page design. It should be easy to see and understand. The best place to convert is on the loading screen. This is known as “above the fold” in the newspaper industry to indicate the first portion of the paper the reader will see. The form should be on the part of the page that’s loaded and seen first.
Use Fonts and Colors That Are Easy to Read
Make sure fonts and colors are appropriate for the form’s topic. The CTA button should stand out. The fonts and colors should match your page’s design so it looks like it belongs there.
Use Clear Labels
The fields and buttons should be easy to understand. Use labels that inform of an action that the user wants to receive. For example, a button labeled “Get your free book” sounds more enticing than one labeled “Submit”. Don’t use the labels to convince the user to sign up. It’s best to use the page copy for this.
Keep Them Informed
Provide feedback that lets them know the form worked correctly. Tell them what happens when they finish the form, that their information was received, that they’ll get an email, etc.
Keep it Accessible
Ensure that every form is accessible. A form with good accessibility is good for all users.
Text and fields should have high contrast so they’re easy to read and understand. Use a contrast checking tool to test your form. Use font types and sizes, such as the free Atkinson Hyperlegible font, which is easy to read on any screen size.
Make sure the form is Web Content Accessibility Guideline (WCAG) compliant. Use ARIA attributes on fields and adjust the ARIA labels to suit screen readers.
Learn about building accessible forms in WS Form.
Remember form navigation. Ensure the form can be navigated using just the keyboard. Apply labels that are easy to understand. For example, consider using the word ‘Required’ instead of just placing an asterisk next to the field.
Use the Lighthouse extension in Chrome Dev Tools to audit the page’s accessibility. It provides a report with indicators on how to improve the page.
Provide Information About Time Perception
Include information on the amount of time will it take for the user to complete the form. 17% of checkout abandonment can be attributed to an overly complicated form. The less the time perception is, the higher the conversion ratios will be.
Form abandonment can be improved or avoided with a few simple practices:
- Keep the number of questions to a minimum. Only ask the questions you need to. Don’t get ‘Greedy Marketer Syndrome’.
- Use conditional logic to reduce the initial time perception.
- Split the form into manageable chunks using tabs.
- Use sections to split a form into logical sections.
- Consider using conversation forms.
Make Sure the Form is Responsive
Users will access your form using mobile or desktop devices. The form needs to work great on any screen. On mobile, avoid multiple columns. It’s better to scroll. On a desktop, use columns to take advantage of the available space.
Learn about creating responsive forms in WS Form.
Use top-aligned labels to help them fit the screen and align properly to the form on any device.
On mobile, use the correct field types to ensure an appropriate keyboard is used. Use the HTML inputmode attribute to help browsers or devices decide which keyboard to display. This attribute can be configured in the settings of several WS Form field types.
Avoid splitting up fields when the information can be combined into a single field. For example,
- Use a Full Name field instead of the First and Last name fields.
- Use a single phone field instead of splitting the phone number with a separate area code.
Field Types
Carefully consider the field types you’re using for your form. Use those that work best for each question. Use radio fields instead of select fields for short lists. Ensure that the labels are clickable. Use the Google Address field to make completing address fields much easier.
Pre-Fill Where Possible
Enable auto-complete to fill in the form for them. If a user is signed in, pre-complete the form with their personal details. Users can make any changes they want, which is much faster than filling out the form from scratch.
Form Validation
A validation error displays when a field is not completed correctly. Ensure that all validation errors are clear and explain how to complete the field properly. Consider using inline form validation, which shows the errors when the user completes the form or as fields are completed.
Include a Reward
If there is a reward, such as a coupon, people are more likely to complete the form. They’ll even complete a longer form for the right reward.
Meet GDPR Requirements
Make sure your form meets all GDPR Opt-in requirements. Always be open and honest about how you will use the data provided by users and make it clear how they can opt-out if they want.
Learn about creating GDPR compliant forms in WS Form.
High Converting Form Example
For our example, I’ll create an affiliate application form. We could start with the Affiliate Application template that’s available within WS Form Pro and make some modifications or create one from scratch. I’ll create one from scratch.
This form will start with one question. Once the user answers that question, the second question will display. This will keep the form simple while the user enters their information, keeping them from getting overwhelmed.
Create the High Converting Form
A multi-step design is ideal for a high-converting form. This keeps the questions contained within minimum space and only shows a few at a time. Multi-step forms can be created in several ways using WS Form. Examples include tabs to change pages, conditional logic to turn questions on and off, and conversational forms that show one question and automatically change to the next question.
Choose a Template or Build from Scratch
For this example, I’ll build a conversational form using the blank template. You could also use a pre-made template that’s available within WS Form Pro.
To create the form, go to WS Form in the WordPress dashboard. Select Add New, click on any of the tabs and choose the template. We’ll also make a few adjustments such as adding tracking and Google Analytics.
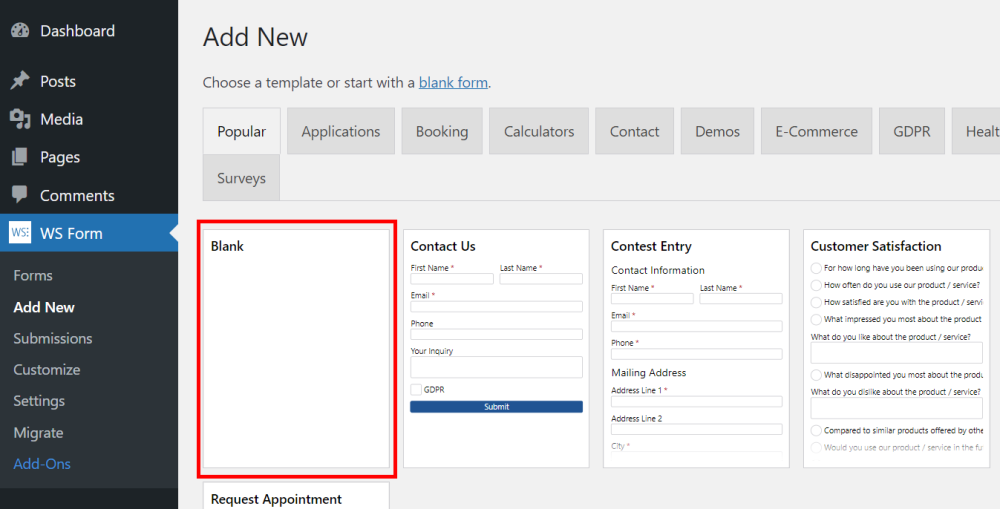
This gives us the blank form that we can build our form with. Next, drag and drop the fields you want to the canvas.
We can improve conversions with tabs, sections, conditional logic, or use other options. We’ll create a conversational form that will display one section or one question at a time and go to the next one automatically. I’ll display one question at a time.
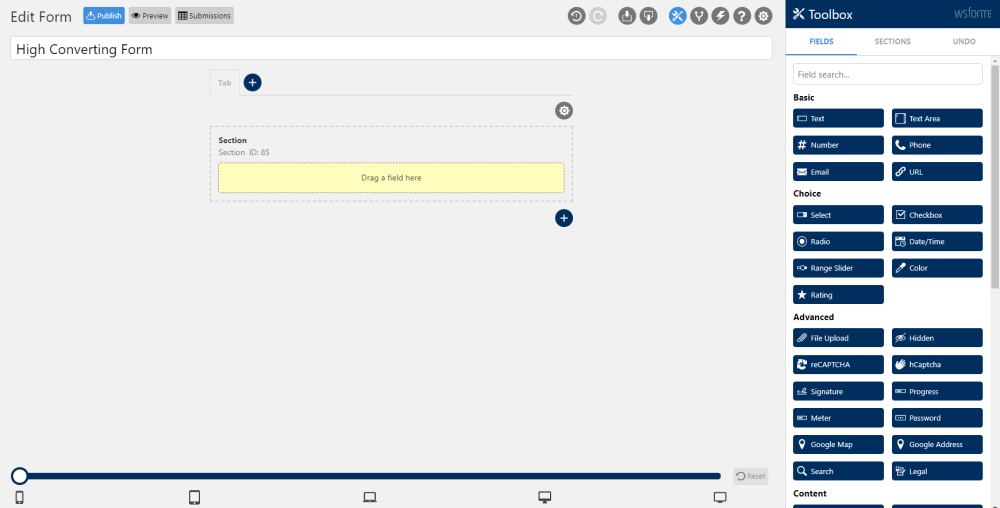
Add Sections and Fields
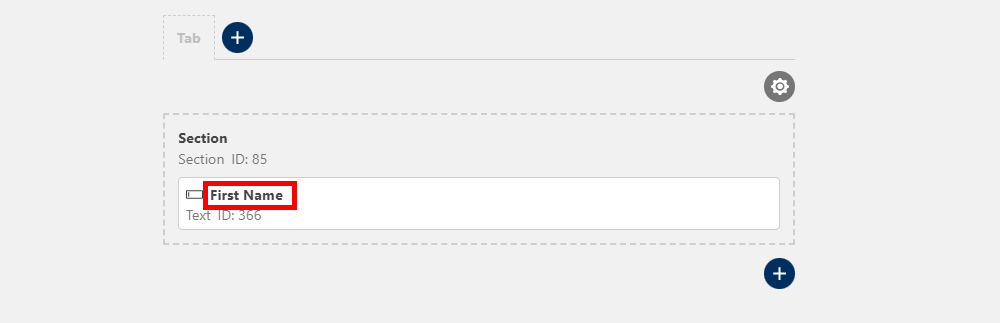
Add the first field by dragging from the right sidebar and dropping it onto the form’s canvas.
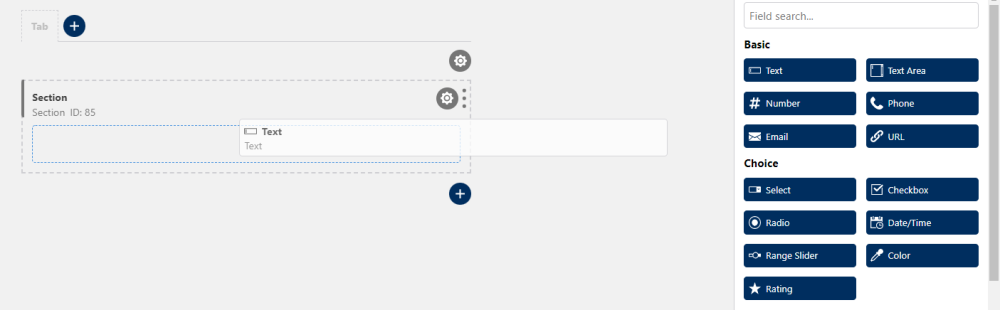
Select the field’s name and change the label.
Next, click the plus icon under the section to add a new section.
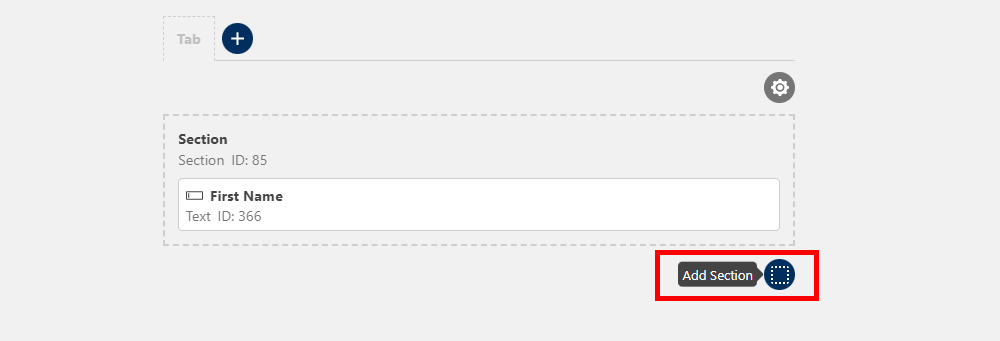
Continue the process until you’ve added all your fields.
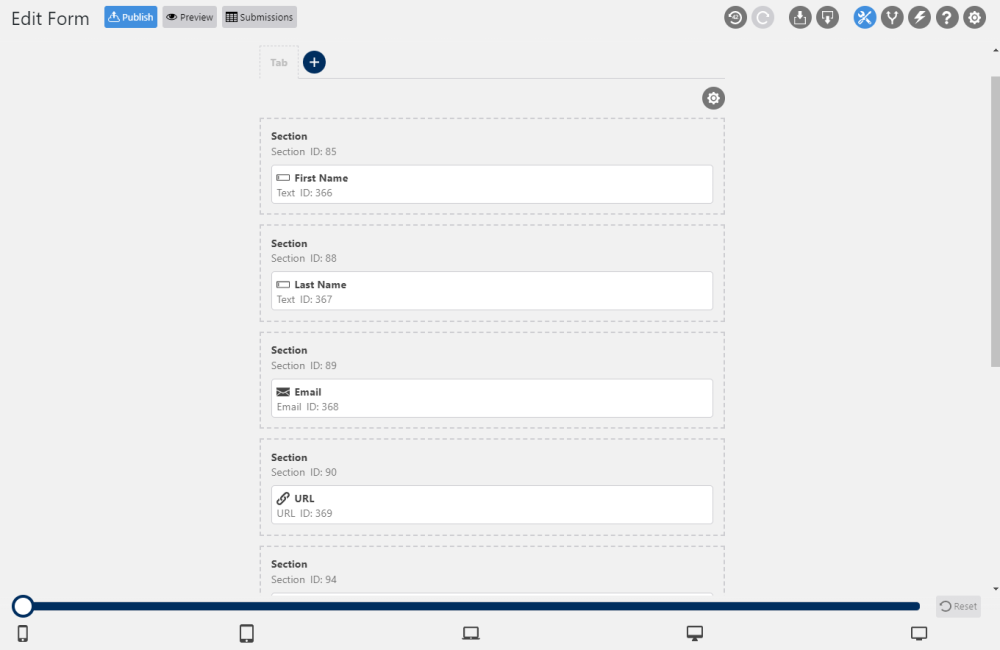
Here’s a look at the form on the front end.

Convert the Form to a Conversational Form
The form looks great, but it can get large and confusing if I wanted to get more information. To make it easier to use, I’ll convert it to a conversational form.
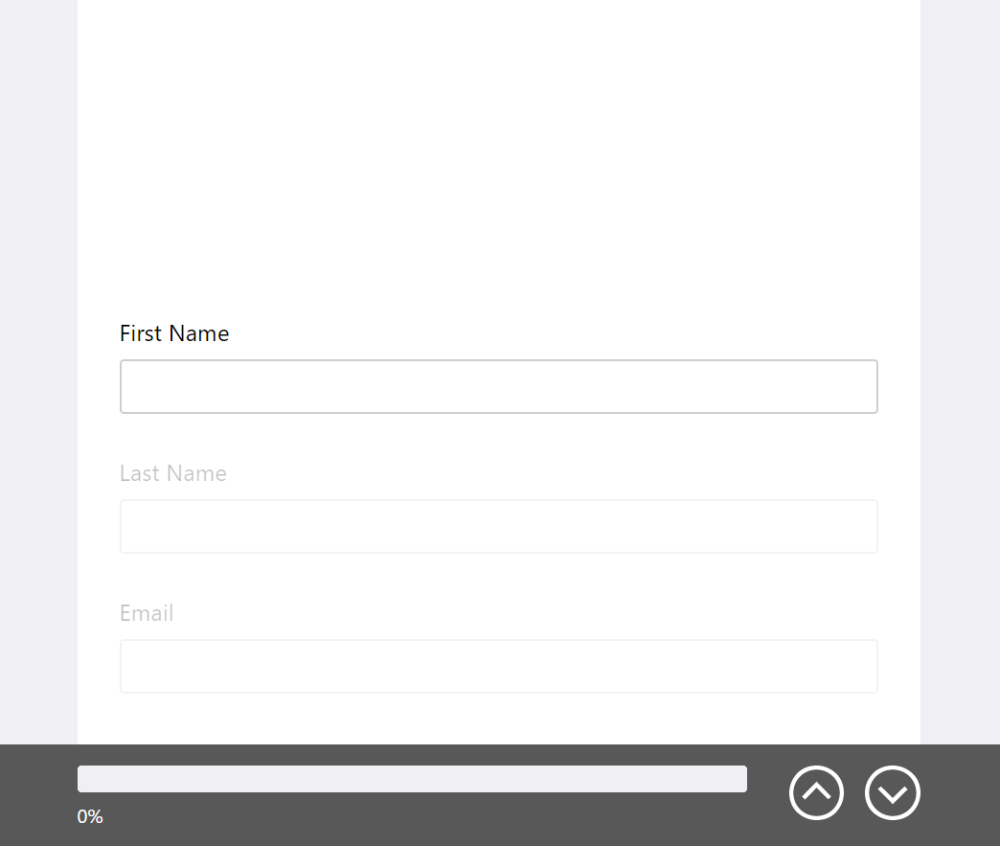
To convert the form to a conversational form, select the form’s settings by clicking the gear above the form. Next, select the Conversational tab and then check the box labeled Enable.
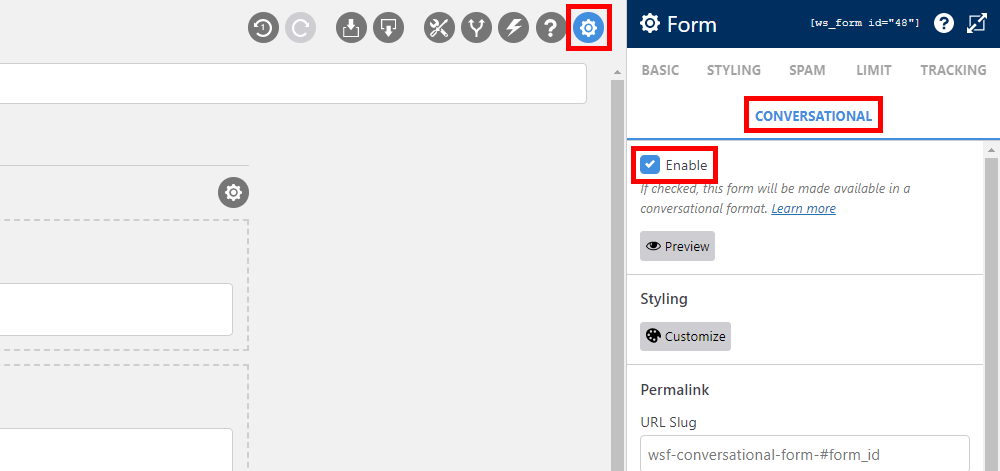
The form now displays the current section as normal, and the other sections are grayed out. A progress bar and navigation buttons are automatically added to the bottom of the page. You can scroll through the form to make a section the current section.
Enable Google Analytics
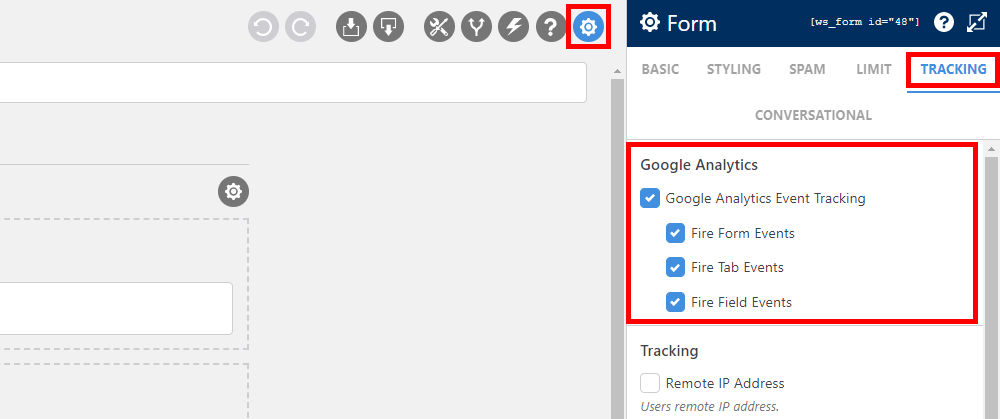
Google Analytics lets you track which fields are being touched. To enable it, select the form’s settings icon, click the Tracking tab, and click Google Analytics Event Tracking in the first section.
Once you enable Google Analytics Event Tracking, select the events you want to track. Enable form events, tab events, and field events independently.
Enable Tracking
![]()
Enabling tracking on the form gives you specific data when the form is submitted. You can select the data you want to track. This is useful for marketing and can be passed along to HubSpot, SalesForce, MailChimp, and many other WS Form addons.
WS Form can track the remote IP address, agent, referrer, OS, hostname, pathname, query string, browser location, IP location, city, region, county, time zone, duration, and lots of UTM options. UTM options include source, medium, campaign, term, and content.
To enable tracking, click the form’s settings icon, select the Tracking tab, and place a check next to every element you want to track under Tracking.
Ending Thoughts
That’s our look at how to build high converting forms with WS Form. Forms designed with conversions in mind need to follow specific design directives. Following the design tips, we’ve discussed here will help you design better forms and improve their conversions. In the next article, we’ll discuss landing pages and see how to use them with a high converting form.
We want to hear from you. Do you have any tips to add for building high-converting forms? Let us know in the comments.
