By default, form validation occurs when a Submit button is clicked (or Add To Cart if you are using the WooCommerce integration).
WS Form also provides extensive options for managing form validation as described below.
Tab Validation
Tab validation prevents users from progressing to the next tab unless the current tab is validated.
To enable this feature:
- Click the Form Settings icon at the top of the layout editor.
- Scroll down to the Tabs section.
- Check the Tab Validation setting.
- Click Save.

Tab Validation – Show Invalid Fields
Tab validation can also be configured to show invalid fields when a Next Tab button is clicked. If invalid fields are found the user will be shown invalid feedback and the form will not progress to the next tab.
To enable this feature:
- Click the Form Settings icon at the top of the layout editor.
- Scroll down to the Tabs section.
- Check the Show Invalid Fields setting.
- Click Save.

Inline Validation
Inline validation allows you to immediately show invalid feedback on a field if it is invalid. WS Form does this by adding the following class at a section or field level:
wsft-validated
While you can add this class yourself (e.g. with class settings or conditional logic) WS Form also has settings for enabling this.
Inline Validation – Fields
- Click the field settings icon.
- Click the Advanced tab.
- Change the Inline Validation setting under Validation. Choose Always to always show invalid feedback when a field is invalidated. Choose On Field Change or Blur to show invalid feedback when a field is changed or blurred (loses focus).
- Click Save.
Inline Validation – Sections
You can enable inline validation of all fields in a section as follows:
- Click the section settings icon.
- Click the Advanced tab.
- Change the Inline Validation setting under Validation. Choose Always to always show invalid feedback when a field within the section is invalidated. Choose On Field Change or Blur to show invalid feedback when a field within the section is changed or blurred (loses focus).
- Click Save.
Check Validation with Conditional Logic
You can add conditional logic IF conditions based upon whether a form, tab, section or field is validated. To do this:
- Click the Conditional Logic icon at the top of the layout editor. The Conditional Logic sidebar will open.
- Click the add + icon.
- In the IF condition, select Form or a tab, section or field.
- Select Validated or Not Validated.
- Complete your THEN and/or ELSE statements.
- Click Save

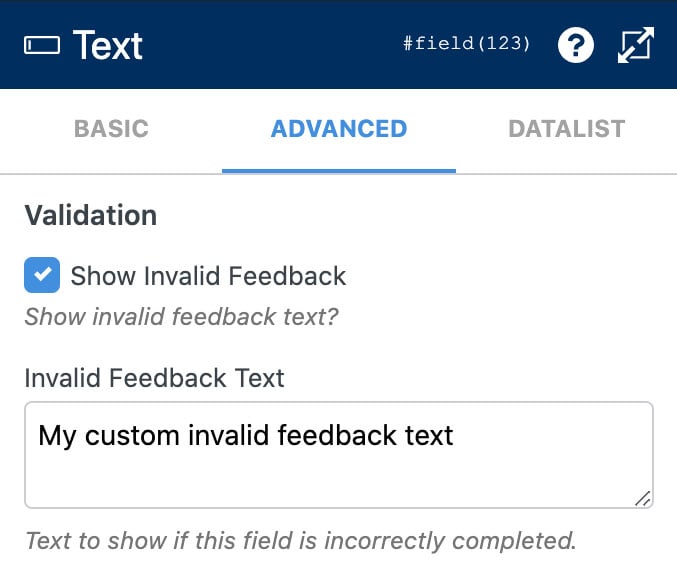
Changing Invalid Feedback Text
When a form is validated, any fields that do not validate will show invalid feedback text below that field. You can change the invalid feedback text that is shown as follows:
- Click the settings icon on the form field.
- Click the Basic tab in the sidebar.
- Scroll down to the Validation section.
- Enter text into the Invalid Feedback Text setting.
- Click Save.