The FunnelKit add-on lets you use WS Form to push form submission data to FunnelKit. The FunnelKit add-on requires WS Form PRO.
You can learn more about FunnelKit WordPress plugin by clicking here.
Installation
The WS Form PRO FunnelKit add-on plugin is installed in the same way as installing the WS Form PRO plugin.
Once installed you will need to activate the license for the plugin. When you purchase the WS Form FunnelKit add-on plugin, you will be given a license key. If you have lost your license key(s), click here.
To activate your license key:
- Click WS Form in the WordPress administration menu.
- Click Settings.
- Click the FunnelKit tab at the top of the page.
- Enter your license key.
- Click the Activate button.
If your license key fails to activate, please ensure you are using the correct license key and not your WS Form PRO license key.
Using a Form with FunnelKit
To push form submission data to FunnelKit you need to add a Add to FunnelKit action.
- When editing your form, click the Actions icon at the top of the page. The Actions sidebar will open.
- Click the Add icon to add a new action.
- Select Add to FunnelKit from the action pulldown.

- Optionally choose when the action should run. By default the action will run when the form is submitted.
- Optionally choose an opt-in field. You can use this to make the action run only when an opt-in checkbox is checked.
That’s it! Your form can now be used to trigger FunnelKit automations.
Create an Automation
To create an automation that is triggered by a form:
- Create a new Automation in FunnelKit.
- Click Select Trigger.
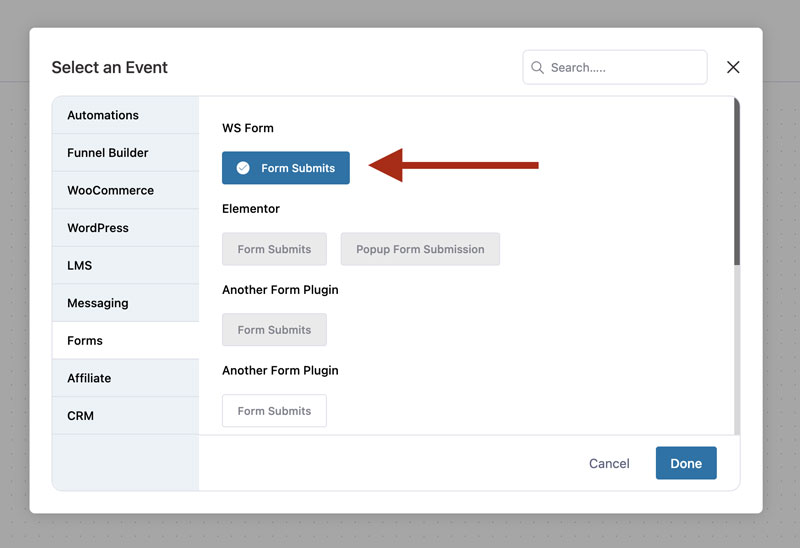
- Select Forms then WS Form > Form Submits.
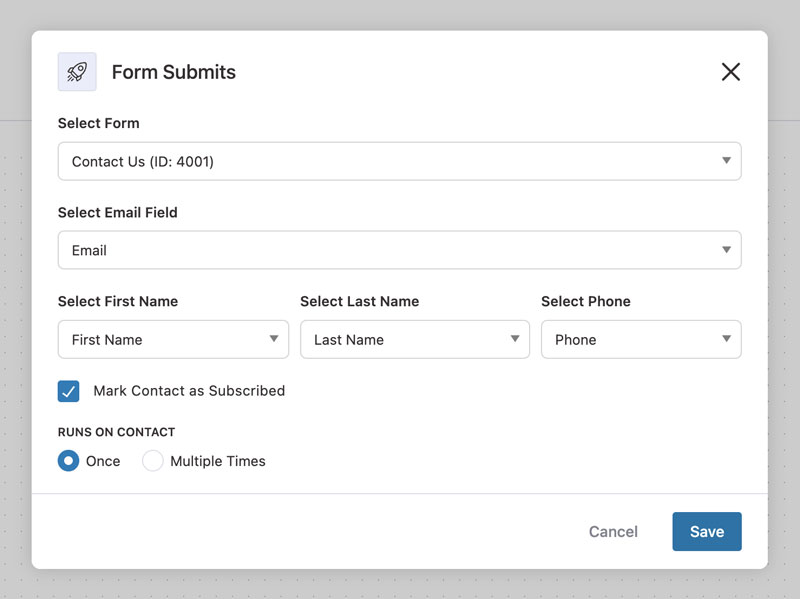
- Choose the form you want to trigger an automation from (The form must include an Add to FunnelKit action, see above). Map the basic contact fields.
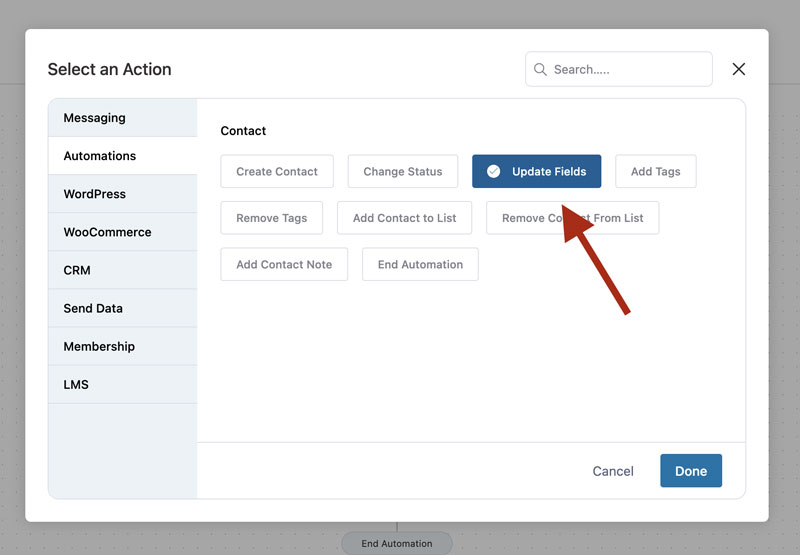
- You can also add an Update Fields action if you want to set additional fields by using WS Form merge fields. To do this click + and then choose Action, then choose Automations > Update Fields.