InstaWP is a toolkit for WordPress development that lets you create WordPress websites instantly, without the need for setup time. These websites are standard WordPress sites where you can easily add plugins, themes, and content. You also have the capability to access, preview, and customize your WordPress website according to your preferences.
With the InstaWP add-on, you can launch WordPress sites using forms made in WS Form. This feature significantly improves the user experience when gathering the necessary information to build a site. Moreover, it opens up various integration possibilities and gives you the option to completely personalize email notifications and messages for new site creations.
Tutorial
Demo
Use Cases
The add-on allows you to:
- Create WordPress sites generated from specific or selected InstaWP templates.
- Create ‘From Scratch’ WordPress sites using InstaWP configurations or by manually specify the WordPress and PHP version.
Installation
The InstaWP plugin is free to download. Click here to download the add-on.
The InstaWP plugin is installed in the same way as installing the WS Form PRO plugin.
Once installed you will need to activate the license for the plugin. When you purchase the InstaWP plugin, you will be given a license key. If you have lost your license key(s), click here.
To activate your license key:
- Click WS Form in the WordPress administration menu.
- Click Settings.
- Click the InstaWP tab at the top of the page.
- Enter your license key.
- Click the Activate button.
If your license key fails to activate, please ensure you are using the correct license key and not your WS Form PRO license key.
Create an InstaWP Account
If you don’t already have an account, register on InstaWP.
You can use coupon code WSFORM20 to get 20% off all annual plans!
Create an InstaWP API Token
To create an API token:
- Click on your Account Icon at the top of the InstaWP admin page, then click My Account.

- Click API Tokens.
- Enter a token name such as WS Form.
- Ensure the read-write setting is checked.
- Click Create to create the token.
- Copy the provided API token to your clipboard.

Connect WS Form to InstaWP
Connecting WS Form to InstaWP is easy!
- Click WS Form in the WordPress administration menu.
- Click Settings.
- Click the InstaWP tab at the top of the page.
- Enter your InstaWP API token. You can find this on the InstaWP API Tokens page.
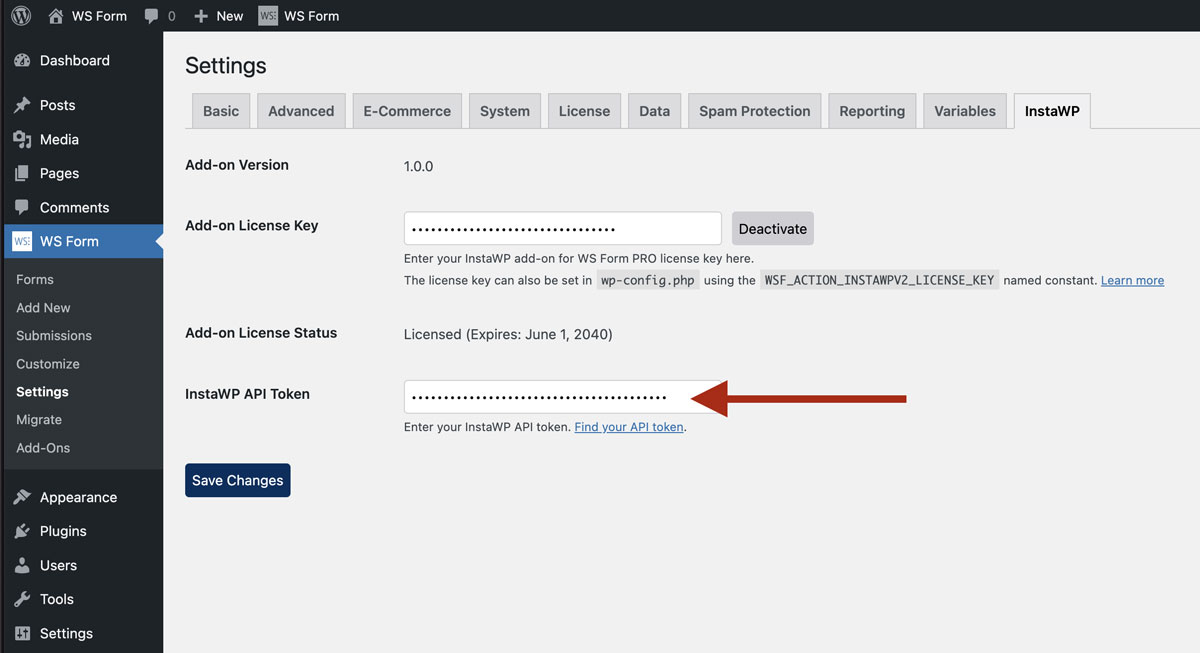
- Click Save Changes.
Form Templates
The following form templates are included with the InstaWP add-on. To access these templates, click on Add New in the WS Form admin and then click the InstaWP tab.
- Site Templates
- Template Selector
- From Scratch
Creating a Form Integrated With InstaWP
Automatically
WS Form can create a form for an InstaWP endpoint in a single click. This process not only creates a form but also fully configures WS Form so that the form is ready to use immediately.
To create a InstaWP form in WS Form:
- Click WS Form in the WordPress administration menu.
- Click Add New.
- Select the InstaWP tab at the top of the page.
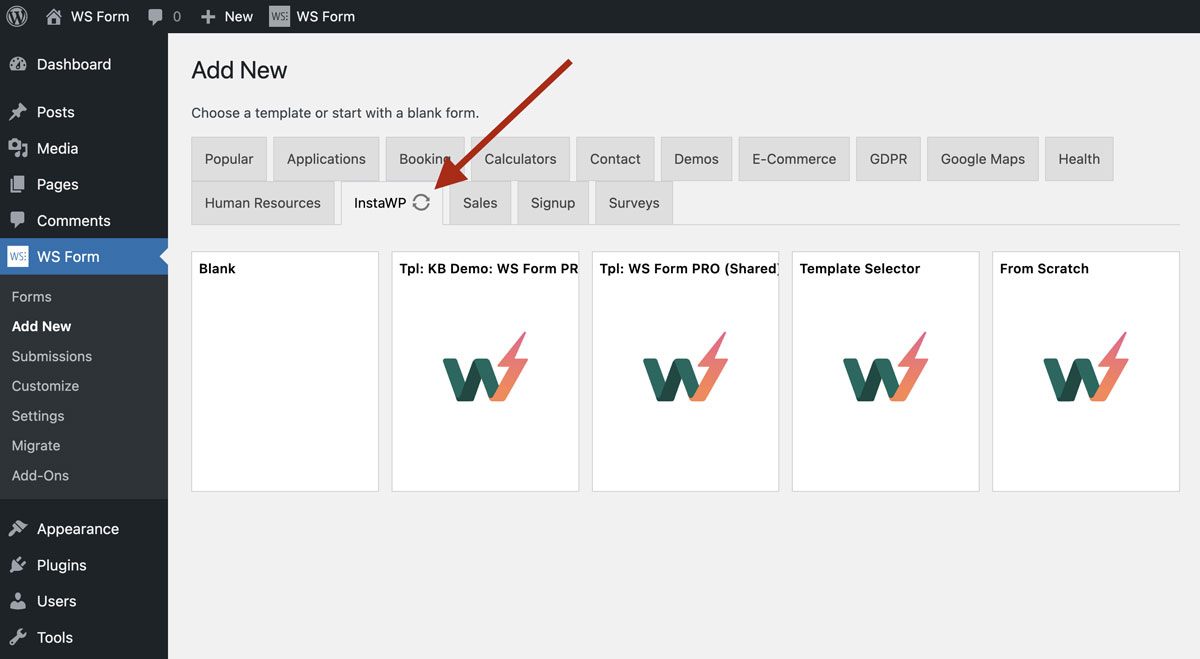
- Click on an InstaWP template to create a form. Note that if you have more than one team, the templates shown will reflect the InstaWP templates associated with the current team you are using in the InstaWP admin.
- Wait a few moments while the form is created.
That’s it! Your form will be created and is ready to add to your website.
Manually
It is also possible to use any form created in WS Form and add an action so that you can make requests to create InstaWP sites.
Add an InstaWP Action
- When editing your form, click the Actions icon at the top of the page. The Actions sidebar will open on the right-hand side of the page.
- Click the Add icon to add a new action.
- Select Create InstaWP Site from the Action pulldown.
- Click Save & Close.
The OpenAI action settings depend on the Method selected.
Template
If you choose an InstaWP Template or the Template Selector method, the following settings will appear.
Template Selector Field
This setting will only appear if the Template Selector method is chosen. Choose a field on your form to use for selecting a template. You can use the InstaWP Templates data source on a Select, Checkbox or Radio field to populate the field with the available templates in your account.
Is Shared
If checked, InstaWP will create a shared site. Share sites have the following properties:
- A site name will be automatically generated, you cannot specify a custom site name.
- The site cannot be set as reserved.
Opt-In Field
Optionally, choose a field on your form to act as an opt-in. If the user opts-in, the create site from template API request to InstaWP will be marked as has_subscribed.
Field Mapping
Use this setting to map the email field on your form to the InstaWP email field.
Site Name
If the Shared setting has been disabled, then you can optionally enter a custom site name. Site names can contain the following characters:
- a-z
- A-Z
- 0-9
- Hyphen (-)
Is Reserved
If the Shared setting has been disabled, then you can use this setting to mark a site as Reserved.
Wait Until Site Created
If checked, WS Form will not run any further actions until InstaWP indicates that the site has been fully created. This ensure if a user clicks on the link to the site that it is fully installed and configured.
If you would rather just allow InstaWP to email the credentials to the user when the site is completed you can disable this setting.
Wait Timeout (Seconds)
Enter the duration in seconds that WS Form will wait for to determine if a site has been completed. This setting defaults to 120 seconds.
From Scratch
Site Name
You can optionally enter a custom site name. Site names can contain the following characters:
- a-z
- A-Z
- 0-9
- Hyphen (-)
If a site name is omitted, InstaWP will automatically generate a site name.
Configuration
You can choose an InstaWP configuration to determine the settings used for the newly created site. If this setting is not used you can manually set the WordPress and PHP versions.
WordPress Version
If you are not using an InstaWP configuration, use this setting to manually select the WordPress version that will be installed on the site.
PHP Version
If you are not using an InstaWP configuration, use this setting to manually select the PHP version that will be use on the site.
Team
If you have teams, you can use this setting to determine which team the site should be added to.
Variables
The InstaWP add-on adds the following variable that can be used in actions:
| Variable | Name | Description | Usage |
|---|---|---|---|
#instawp_site_id | Site ID | Returns the ID of the site created. | Actions |
#instawp_site_password | Site password | Returns the administrator password of the site created. | Actions |
#instawp_site_url | Site URL | Returns the URL of the site created. | Actions |
#instawp_site_url_auto_login | Site Auto Login URL | Returns the auto login URL of the site created. | Actions |
#instawp_site_username | Site username | Returns the administrator username of the site created. | Actions |