The Webex add-on allows you to push messages to Webex using a WordPress form.

You can fully configure the message sent to Webex with setting such as:
- Message text
- File attachment
- Adaptive card design
… and more! You can incorporate WS Form variables into any of the message settings.
Installation
The Webex plugin is installed in the same way as installing the WS Form PRO plugin.
Once installed you will need to activate the license for the plugin. When you purchase the Webex plugin, you will be given a license key. If you have lost your license key(s), click here.
To activate your license key:
- Click WS Form in the WordPress administration menu.
- Click Settings.
- Click the Webex tab at the top of the page.
- Enter your license key.
- Click the Activate button.
If your license key fails to activate, please ensure you are using the correct license key and not your WS Form PRO license key.
Connecting to Webex
In order to use the add-on, you need to connect it to Webex. Connecting is easy!
- Click WS Form in the WordPress administration menu.
- Click Settings.
- Click the Webex tab at the top of the page.
- Click Connect and follow the onscreen prompts
If you do not have a Webex account, you can create a new account here.
Creating a Webex Form
Automatically (Recommended)
WS Form PRO can create a form that is is pre-configured to push messages to any of your Webex spaces. The form comes with a single text field but you can add other fields that can also be pushed to Webex. This process not only creates a form but also fully configures WS Form PRO so that the form is ready to use immediately.
To create a Webex form in WS Form:
- Click WS Form in the WordPress administration menu.
- Click Add New.
- Select the Webex tab at the top of the page.
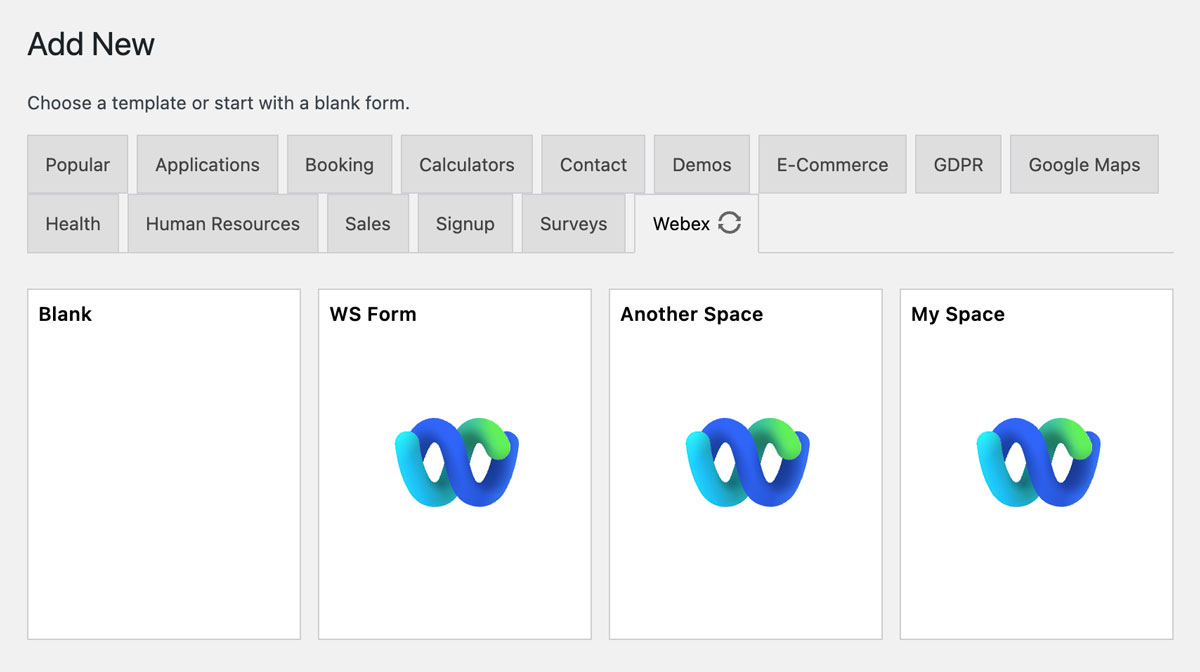
- Click on any of your Webex spaces to create a form.
- Wait a few moments while the form is created.
That’s it! Your form will be created and is ready to add to your website.
If you chose a private Webex space you must first add WS Form as an app to that space. To add WS Form to a private space, click on the Conversation settings icon (gear) at the top of the space, then click Add App, then add WS Form.
Manually
It is also possible to use any form created in WS Form and add an action so that it is submitted to Webex when a user saves or submits their form.
To add a Webex action:
- When editing your form, click the Actions icon at the top of the page. The Actions sidebar will open on the right-hand side of the page.
- Click the Add icon to add a new action.
- Select Add to Webex from the Action pulldown. A series of settings will appear.
As with all sidebars in WS Form, click to the Save button at the bottom to save your changes, or click Cancel to disregard your changes.
The Webex action settings are as follows:
When Should This Action Run?
You can choose to run the user management action when the form is saved, submitted, or both.
Webex Channel
Choose the Webex space you would like to push the form submission data to.
Text
This is the main text you would like to be sent to Webex. You can either enter static text into this field, or include WS Form variables.
If you opt to create an Adaptive Card (See below) you should still enter a value in this setting.
File
Choose a File Upload or Signature field to attach to the message. The file handler for that field should be set to Media Library.
Use Adaptive Card
Check this box if you want to use an adaptive card for your message.
If you opt to use this display method, the Text and File settings will be ignored by Webex. However, you must have the Text or File setting configured.
Body (Adaptive Card)
The body of an adaptive card consists of rows of text or images.
To add a body row:
- Click the Add icon at the bottom right of the Body section.
- Choose a body type. Text Block or Image.
- Enter a value for the body. For a Text Block, enter the text you want to be shown. For an Image block, enter the public URL to an image. WS Form variables can be used in this setting.
- Choose a size.
- Repeat this process for each row you wish to add.
- Click the Save button at the bottom of the sidebar to save your changes.
Actions (Adaptive Card)
Actions on an adaptive card consists of buttons.
To add a button:
- Click the Add icon at the bottom right of the Actions section.
- Choose an action type. At present only Open URL is an option.
- Enter a value for the action. This should be a URL that the browser will go to when the button is clicked. WS Form variables can be used in this setting.
- Enter a title for the button.
- Repeat this process for each button you wish to add.
- Click the Save button at the bottom of the sidebar to save your changes.
To Person Email
This field can be used to send messages directly to user by their email address. If an email address is entered, the Webex Space setting will be ignored. WS Form variables can be used in this setting.
Note: The WS Form PRO Webex Add-On is not created by, affiliated with, or supported by Cisco.