In this tutorial we’ll show you how to set up form redirects using conditional logic. This enables you to redirect to different web addresses depending on the choice a user makes on your form.
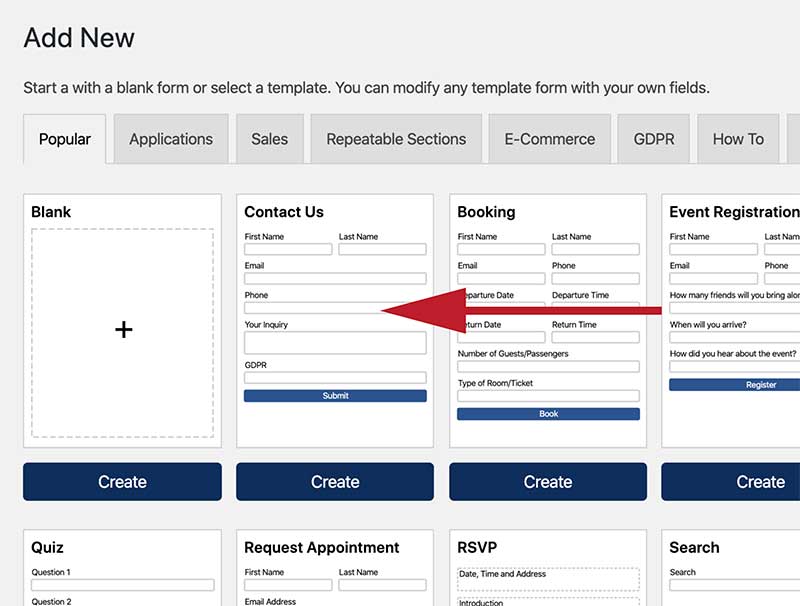
1. Create Form
For the purpose of this tutorial, we’ll create two different redirects for a Contact Us form. When the form us submitted it will redirect to either a Sales or Support page depending on the selection made by the user completing the form.
To create a quick Contact Us form:
- Click on Add New from the WS Form administration menu.
- Click the Contact Us template.
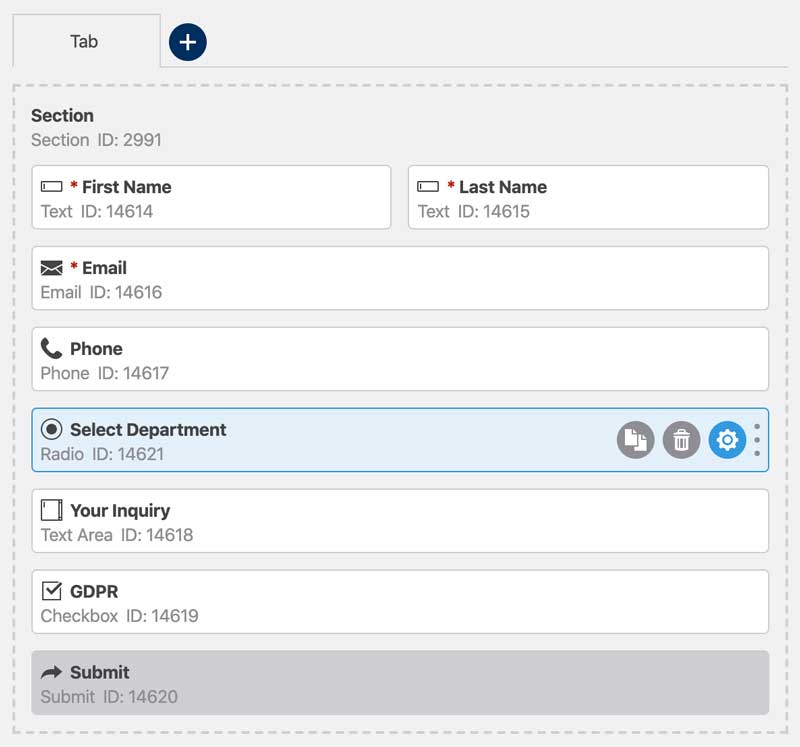
2. Add Radio Field
Once you are in the layout editor, we are going to add a radio field to the form that will be used to select a department. You could also use a select field if you wish. To do that, we simply click or drag and drop the Radio field from the Build sidebar. We’ll give that field a label of Select Department, but you can label it anything you wish. Of course, the input criteria could be anything you wish but for the purpose of this tutorial we’ll use a radio field as our conditional logic criteria.
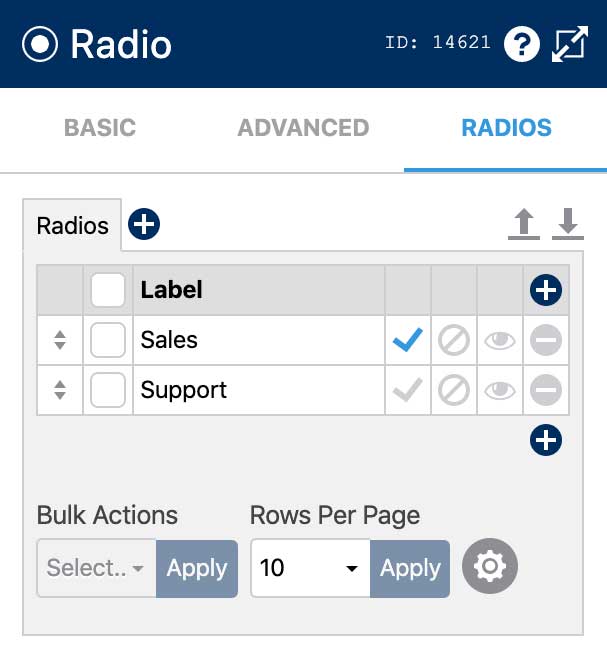
3. Configure Radio Field
Next we need to configure the radio field with the departments we want to allow the user to choose from.
- Click on the settings (gear) icon for the Select Department field.
- In the sidebar, click the Radios tab.
- Remove the sample rows and then add as many rows as you need for each intended recipient. We’ll add Sales and Support in this tutorial.
- Click the checkmark on the first row to ensure the first row is checked by default. We need to do this to ensure at least radio is selected. Another option is that you could check the Required checkbox in the Basic tab to ensure at least radio is checked when the form is submitted.
- Click Save at the bottom of the sidebar to save your changes.
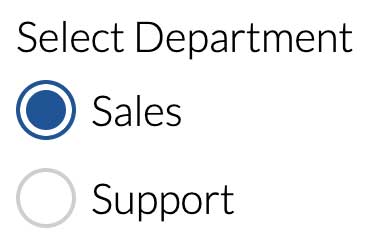
If you preview the form, it will now display two radio fields that allow the user to select which recipient they would like their inquiry to go to.
Next we need to set up two redirect actions, one for each department.
4. Set Up Redirect Actions
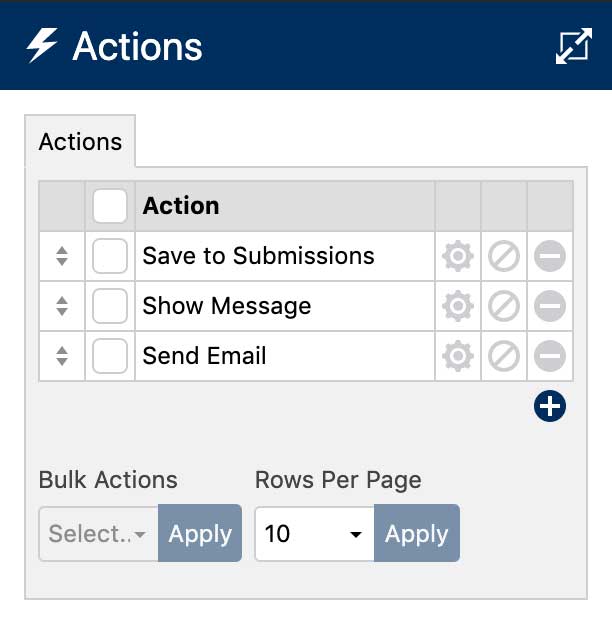
To access the redirect actions, click the Actions icon at the top of the page. This will open the Actions sidebar:
Because this is a new form, we’ll need to add two new Redirect actions. You would create as many Redirect actions as you need. To do this:
- Click the add icon below the action list to add a new action.
- Select Redirect from the Action pulldown list.
- We’ll rename that action by clicking on it and then enter Redirect to Sales.
- In the URL setting, enter the URL you want to redirect to. In this example we’ll use /sales/ as the path. This can be any URL you wish, including external websites, e.g. https://wordpress.org
- Repeat the above and call it Redirect to Support

You should then end up with two actions, one called Redirect to Sales and one called Redirect to Support (or whatever department names you have chosen).
For each redirect action, configure the URL. For more information about configuring the Redirect action, click here.
5. Conditional Logic
The last step is to create the Conditional Logic. WS Form conditional logic enables you to enable and disable actions based upon the output of an IF condition.
In this tutorial, we want to enable the Redirect to Sales if the Sales radio is checked. Likewise if the Support radio is checked instead, we will want the Redirect to Support action to be enabled.
The pseudo logic for the sales condition would be:
IF ROW CHECKED IS THEN RUN ACTION ON SUBMIT ELSE DO NOT RUN ACTION ON SUBMIT
To create this conditional logic:
- Click the Conditional Logic icon at the top of the layout editor. The Conditional Logic sidebar will open.
- Click the add icon below the conditional logic list.
- Enter a label for the conditional logic, e.g. Redirect to Sales
- Create the conditional logic (see below).
- Click Save at the bottom of the sidebar.
An example of how to set up the above pseudo logic is shown below:

Create conditions for each of your redirects. And that’s it!
WS Form will now enable the appropriate Redirect action depending on which radio has been checked. Click Preview to try it or click Publish and add the form to your web site.