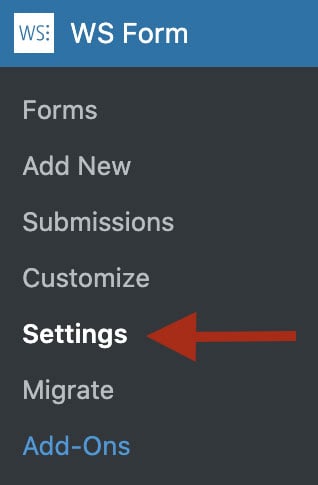
The settings page enables you to configure global settings for WS Form. It is accessed from the WordPress admin menu by navigating to WS Form > Settings.
The settings page is organised into tabs. Some tabs are available only in WS Form PRO or when the corresponding integration is installed.
Click a tab below to view its available settings.
Basic
The Basic tab contains settings for previews, the form editor, statistics and the WordPress administration area.
Preview
Live
When enabled, changes made to a form are automatically reflected in the preview window.
Template
Select the page template WS Form should use when previewing forms.
When set to Automatic, WS Form attempts to find an appropriate template. If a suitable template cannot be found, WS Form uses a basic fallback template.
Debug
Debug Console
Choose when the WS Form Debug Console should be displayed.
The available options allow you to restrict access to appropriate users, such as administrators.
The Debug Console provides information that can help you build, test and troubleshoot forms.
Learn more about the WS Form Debug Console.
Layout Editor
Column Guidelines
Choose when column guidelines should be displayed while editing forms.
The available options are:
- Off – Column guidelines are not shown.
- On Resize – Column guidelines are shown when you resize a section or field.
- Always – Column guidelines are always shown.
Auto Publish
When enabled, changes made in the form editor are automatically published.
When disabled, changes remain unpublished until the form is manually published.
Breakpoint Widths
When enabled, the form editor adjusts the form preview width to match the breakpoint selected at the bottom of the editor.
This provides a more accurate representation of how the form may appear at different device widths.
HTML Compatibility Helpers
When enabled, compatibility helper links are shown for settings associated with browser support.
These links use data from Can I Use to help developers determine whether particular HTML features are supported by different web browsers.
Icon Tooltips
When enabled, tooltips are shown for icons in the form editor.
Sidebar Help Text
When enabled, explanatory help text is shown beneath settings in the form editor sidebar.
Searchable Sidebar Dropdowns
When enabled, dropdown settings in the form editor sidebar become searchable when they contain 20 or more options.
This makes it easier to locate an option in longer dropdown lists.
Statistics
Disable
When enabled, WS Form stops collecting statistical data about forms, including views, saves and submissions.
Include Admin Traffic
When enabled, traffic generated by logged-in administrators is included in form statistics.
Leave this disabled if you do not want administrative testing and previews to affect form statistics.
Method
Choose how WS Form should collect form statistics.
The available methods are:
- AJAX
- AJAX Low Resource
- Server Side
The AJAX methods generally provide the most reliable statistics because a request is made each time a form is displayed.
The AJAX Low Resource method uses a lightweight PHP script that requires minimal server resources. The script is located at:
<WS Form Plugin Install Path>/public/add-view.php
Some servers may prevent this script from running because of their security configuration. WS Form automatically disables this option if the script cannot be used.
The Server Side method does not require an additional HTTP request. However, statistics may be less accurate when page caching is enabled because PHP may not execute each time the page is viewed.
Administration
Disable Unread Submission Bubbles
When enabled, unread submission count bubbles are not shown in the WordPress administration area.
Disable Toolbar Menu
When enabled, the WS Form menu is not shown in the WordPress admin toolbar.
Disable Translation
When enabled, WS Form translations are disabled and the original plugin language strings are used.
Advanced
The Advanced tab contains settings for performance, JavaScript components, uploads, cookies, Google services, geolocation, tracking links and submission previews.
Performance
Dynamic Enqueuing
When enabled, WS Form dynamically loads only the CSS and JavaScript components required by the functionality and field types used on a form.
This can reduce the amount of front-end code loaded on pages containing forms.
JavaScript
Defer
When enabled, scripts generated by WS Form include the defer attribute.
The defer attribute instructs the browser to delay script execution until the HTML document has been parsed. This can prevent scripts from blocking page rendering, but it may delay the initial rendering of a form.
Learn more about the defer attribute.
Enqueue in Footer
When enabled, scripts associated with WS Form are enqueued in the website footer.
Source
Choose whether shared JavaScript libraries should be loaded locally from your server or from a content delivery network.
Using Local is recommended. Some optimisation plugins may require a different configuration.
Date/Time Picker
Choose when WS Form should load its date and time picker component.
The available options include:
- Always – Always load the WS Form date and time picker.
- If Native Not Available – Load the WS Form picker only when the browser does not provide a native picker.
- Never – Do not load the WS Form picker.
Color Picker
Choose when WS Form should load its colour picker component.
File Uploads
Maximum File Size (Bytes)
Enter the maximum permitted file upload size in bytes.
WS Form uses the upload limit configured by PHP on your server by default. You can enter a lower value, but the value cannot exceed the server upload limit.
Click Use php.ini Value to restore the value configured by PHP.
Maximum Files
Enter the maximum number of files that can be uploaded simultaneously.
WS Form uses the maximum upload count configured by PHP on your server by default. You can enter a lower value, but the value cannot exceed the server limit.
Click Use php.ini Value to restore the value configured by PHP.
Cookies
Cookie Timeout (Seconds)
This setting determines how long session cookies created by WS Form remain valid.
Cookies may be used by save and continue functionality to identify a visitor when they return to a form.
Common values include:
- 3600 – One hour.
- 86400 – One day.
- 604800 – One week.
Cookie Prefix
The default cookie prefix is ws_form.
WS Form prefixes its cookies to help prevent conflicts with cookies created by other plugins. Change this setting only when a different prefix is required.
Enable Save Cookie
When enabled, WS Form sets a cookie when a form is saved.
This allows a visitor to return to the form on the same device and continue their submission.
API Key
Enter the Google API key used by features such as the Google Address field, Google Map field and Google Routing field.
API Version
Choose the Google Places API version used by WS Form.
For Google accounts registered after March 1, 2025, select Places API (New).
Geolocation Lookup By IP
Service
Choose the service WS Form should use for IP-based geolocation lookups.
Available services include:
These services offer different free and commercial plans.
geoplugin.com API Key
Enter your geoplugin.com API key if you use a commercial account.
The API key is used for server-side tracking lookups and is not exposed for client-side geolocation requests.
ip-api.com API Key
Enter your ip-api.com API key if you use a commercial account.
The API key is used for server-side tracking lookups and is not exposed for client-side geolocation requests.
ipapi.co API Key
Enter your ipapi.co API key if you use a commercial account.
The API key is used for server-side tracking lookups and is not exposed for client-side geolocation requests.
ipinfo.io API Key
Enter your ipinfo.io API key if you use a commercial account.
The API key is used for server-side tracking lookups and is not exposed for client-side geolocation requests.
Tracking Links
URL Mask – IP Lookup
Enter the URL mask used when linking a tracked IP address to an external lookup service.
The following value is replaced with the IP address:
#value
Learn more about form tracking.
URL Mask – Lat/Lon Lookup
Enter the URL mask used when linking tracked latitude and longitude coordinates to an external mapping service.
The following value is replaced with the latitude and longitude:
#value
Submissions
Enable Edit in Preview
When enabled, the Edit in Preview option is available when viewing submissions.
This allows submissions to be loaded into the form preview for editing.
If a form is resubmitted from the preview, it is processed using conditional logic rather than the original processing path.
Styling
The Styling tab controls the markup, colour scheme and CSS used by forms.
Markup
Framework
Choose the framework WS Form should use when rendering front-end HTML.
Click Detect to allow WS Form to attempt to detect the framework used by your website.
When a supported framework is selected, WS Form outputs HTML and CSS classes appropriate for that framework.
If you are not using a specific CSS framework, select WS Form.
Layout CSS
When enabled, WS Form outputs the CSS responsible for responsive form layout.
Disable this only if your theme or another framework already provides the required layout styles.
Style CSS
When enabled, WS Form outputs its built-in visual styles, including colours, typography and form control styling.
Click View Styles to manage the styles used by WS Form.
Disable this setting if all form styling will be provided by your own CSS.
Column Count
Choose the number of columns used by the responsive form layout grid.
We recommend leaving this setting at 12 unless your website uses a different grid configuration.
Scheme
Color Scheme
Choose whether your website uses a light or dark colour scheme.
WS Form uses this setting when rendering form controls and other interface elements.
Auto Color Scheme
When enabled, WS Form detects the visitor’s preferred colour scheme and automatically uses light or dark styling where supported.
Performance
Compile CSS
When enabled, WS Form precompiles its CSS to improve front-end performance.
This setting is recommended for production websites.
Inline CSS
When enabled, WS Form outputs generated CSS directly within the page instead of loading a separate stylesheet.
CSS Cache Duration
Enter the browser cache duration for generated CSS files.
The value is specified in seconds.
AI
The AI tab contains settings for AI connectors, the WordPress Abilities API and the WS Form MCP Adapter.
These settings are used by AI features such as Create from AI, the Make AI Request action and authenticated AI clients that connect through the Model Context Protocol.
AI Connectors
AI connectors allow WS Form to communicate with providers such as Anthropic, Google Gemini and OpenAI.
Status
Shows whether AI connectors are currently configured and available.
Connectors
Click Connectors to manage the AI connectors installed on your website.
AI connectors are used by the Create from AI template and the Make AI Request action.
Abilities API
The Abilities API registers WS Form abilities with the WordPress Abilities API so that compatible AI clients can discover them.
Include in MCP Discovery
When enabled, WS Form abilities are included during MCP discovery.
This allows compatible AI clients to discover the actions available through WS Form. Authentication and user permissions still apply.
Allow Updates
When enabled, authenticated AI clients can create or update forms.
Enable this setting only when you trust the AI clients that connect to your website.
Allow Deletes
When enabled, authenticated AI clients can delete forms.
Enable this setting only when you trust the AI clients that connect to your website.
MCP Adapter
The MCP Adapter registers a dedicated WS Form PRO MCP server endpoint that authenticated AI clients can connect to.
These setting will only appear if the WordPress MCP Adapter is available. You can install the MCP Adapter plugin or rely on a third party plugin that includes these classes such as Novamira.
Enable
When enabled, the dedicated WS Form MCP server endpoint is registered.
Server URL
The Server URL is the endpoint AI clients use to connect to WS Form.
Click the copy icon next to the URL to copy it to your clipboard.
E-Commerce
The E-Commerce tab controls global currency formatting and price editing settings.
Prices
When WooCommerce is active, the price settings are inherited from the WooCommerce store configuration.
Click Edit to open the corresponding WooCommerce settings.
Currency
Choose the currency used for prices in forms.
Currency Position
Choose whether the currency symbol is displayed to the left or right of the price.
Thousand Separator
Enter the character used to separate thousands in prices.
Decimal Separator
Enter the character used to separate decimal values in prices.
Number of Decimals
Enter the number of decimal places used when displaying prices.
Submissions
Allow Price Field Edits
When enabled, price field values can be edited while viewing or editing a submission.
Changing a price does not recalculate totals or other calculated values in the submission. Any dependent values remain unchanged.
System
The System tab provides information about your WS Form installation and hosting environment.
The system information is divided into sections that may include:
- WS Form
- WordPress
- PHP
- Web Server
- Database
If WS Form detects a potential issue, a warning is shown next to the relevant item.
This information can be useful when troubleshooting compatibility, configuration or hosting problems.
License
The License tab is available when WS Form PRO is installed.
Learn more about WS Form licensing.
Version
Shows the installed version of WS Form PRO.
Updates can be managed from the WordPress Plugins page.
License Key
Enter the license key provided when WS Form PRO was purchased, then click Activate.
License Status
Shows the current status of the WS Form PRO license.
When the license has been activated successfully, the status is shown as Activated.
Data
The Data tab contains tools for resetting form statistics, managing data encryption and controlling what happens when WS Form is uninstalled.
Forms
Reset Statistics
Select a form and click Reset to permanently clear its statistical data.
This includes the form statistics used for views, saves, submissions and reporting.
Reset statistics cannot be recovered.
Encryption
Enable Data Encryption
When enabled, WS Form encrypts submission metadata before it is stored in the database.
Data encryption requires an encryption key to be configured in the website’s wp-config.php file.
Learn more about WS Form data encryption.
Encryption Status
Shows the current data encryption status.
The status indicates whether an encryption key has been found and whether submission metadata is currently being encrypted.
Review any warning shown in this section before enabling data encryption.
Uninstall
Delete Plugin Settings on Uninstall
When enabled, WS Form plugin settings are permanently deleted when the plugin is uninstalled.
This data cannot be recovered.
Delete Database Tables on Uninstall
When enabled, the database tables created by WS Form are permanently deleted when the plugin is uninstalled.
This may include forms, submissions and related data. This data cannot be recovered.
Spam Protection
The Spam Protection tab contains global credentials and security settings used by supported CAPTCHA services and WordPress NONCE validation.
reCAPTCHA
Site Key
Enter the Google reCAPTCHA site key used by reCAPTCHA fields.
This value can be overridden in the settings of an individual field.
Secret Key
Enter the Google reCAPTCHA secret key used to validate reCAPTCHA responses.
This value can be overridden in the settings of an individual field.
Default reCAPTCHA Type
Choose the default reCAPTCHA type used when a new reCAPTCHA field is added to a form.
The type can be changed in the settings of an individual field.
hCaptcha
Site Key
Enter the hCaptcha site key used by hCaptcha fields.
Secret Key
Enter the hCaptcha secret key used to validate hCaptcha responses.
Turnstile
Site Key
Enter the Cloudflare Turnstile site key used by Turnstile fields.
Secret Key
Enter the Cloudflare Turnstile secret key used to validate Turnstile responses.
CaptchaFox
Site Key
Enter the CaptchaFox site key used by CaptchaFox fields.
Secret Key
Enter the CaptchaFox secret key used to validate CaptchaFox responses.
NONCE
Enable NONCE
When enabled, WS Form adds a WordPress NONCE to form submissions.
WordPress NONCEs help protect forms against unauthorised requests.
NONCE validation is always used when a form is submitted by a logged-in user.
If page caching is enabled, we recommend keeping the combined browser and server cache duration below 10 hours. Longer caching periods may cause expired NONCE values to produce submission errors.
Learn more about WordPress NONCEs.
Reporting
The Reporting tab controls scheduled form statistics emails and form submission error notifications.
Form Statistics Email
The Form Statistics Email provides a scheduled summary of form views, saves, submissions and conversion rates.
Enable
When enabled, WS Form sends the Form Statistics Email according to the configured schedule.
Published Forms
When enabled, only published forms are included in the report.
Frequency
Choose how often the report should be emailed.
Available options include daily, weekly and monthly reporting.
Day to Send
Choose the day of the week on which a weekly report should be sent.
This setting is available when Frequency is set to Weekly.
Email To
Enter one or more email addresses that should receive the report.
Separate multiple email addresses with spaces.
Click Send Test to send a test report using the current configuration.
Save any changes before clicking Send Test to ensure the latest settings are used.
Email Subject
Enter the subject line used for Form Statistics emails.
Form Submission Error Email
The Form Submission Error Email notifies recipients when an error occurs while WS Form is processing a submission.
Enable
When enabled, WS Form sends email notifications when submission processing errors occur.
Frequency
Choose how often error notifications should be sent.
Available options include:
- Real-Time
- Once Per Minute
- Once Per Hour
- Once Per Day
Email To
Enter one or more email addresses that should receive submission error notifications.
Separate multiple email addresses with spaces.
Click Send Test to send a test email using the current configuration.
Email Subject
Enter the subject line used for submission error emails.
Variables
The Variables tab controls the default output of selected WS Form variables used in email and PDF templates.
Variable: #email_logo
The #email_logo variable inserts a configured logo into an email or PDF template.
Image
Click Select Image to choose the image used by the #email_logo variable.
The selected image can be inserted into templates using:
#email_logo
We recommend removing unnecessary whitespace from the image before uploading it.
Size
Choose the WordPress image size used when rendering the logo.
The recommended maximum image dimensions are 400 by 200 pixels.
Variable: #email_submission
The #email_submission variable outputs the contents of a submission in email and PDF templates.
Tab Labels
Choose when tab labels should be included.
The available options are:
- Auto – Show the tab label only when the tab contains a non-empty field and Show Label is enabled for the tab.
- Yes – Show the tab label when Show Label is enabled for the tab.
- No – Never show the tab label.
Section Labels
Choose when section labels should be included.
The available options are:
- Auto – Show the section label only when the section contains a non-empty field and Show Label is enabled for the section.
- Yes – Show the section label when Show Label is enabled for the section.
- No – Never show the section label.
Field Labels
Choose when field labels should be included.
The available options are:
- Auto – Show the field label when the field contains a value and Show Label is enabled.
- Yes – Always show the field label.
- No – Never show the field label.
Static Fields
When enabled, static fields such as Text fields and HTML fields are included in the output unless excluded in the settings of an individual field.
Exclude Empty Fields
When enabled, fields without a value are excluded from the generated output.
Variable: #field
These settings control the default output of file and signature values rendered using the #field variable.
Show File Preview
When enabled, previews of uploaded files and signatures are shown where supported.
This setting is compatible with the WS Form (Private), WS Form (Public) and Media Library file handlers.
Show File Name and Size
When enabled, the file name and file size are shown for uploaded files and signatures.
This setting is compatible with the WS Form (Private), WS Form (Public) and Media Library file handlers.
If Show File Preview and Show File Name and Size are both disabled, WS Form still displays the file name.
Link to Files
When enabled, links are added to uploaded files and signatures.
The Send Email action includes a separate setting that controls whether links are included in email content.
This setting is compatible with the WS Form (Private), WS Form (Public) and Media Library file handlers.