
The Google Routing field enables you to retrieve route information in forms for WordPress. Simply specify two form fields to act as a start and end location and WS Form will automatically make the calculations for you.
The following information can be obtained using this field:
- Route distance
- Text description
- Value (miles, yards, kilometers and meters)
- Route duration
- Text description
- Value (seconds, minutes, hours, days, weeks and years)
- Summary (A short description of the route)
- Latitude and Longitude of Start and End locations
Furthermore the route can also be shown on a WS Form Google Map field.
The above information is retrieved using the Google Routes API each time the start and end locations are completed and/or changed.
Demo
How It Works
When a user enters a start and end location, the Google Routes API will request route information. If a route can be determined, information about the route is populated to fields on your form. The Google Routing field itself can be used to show information or it can be hidden if it is not required.
The Google Routing field can be used in conjunction with Google Address fields for easy choosing of start and end locations, as well as the Google Map field to show the route on a map.
Each Google Routing component can be mapped to one or many fields on your form, giving you complete flexibility over how the data is used.
The output can also be used in conjunction with Conditional Logic, Calculated Fields and E-Commerce Fields.

Setup
The Google Routing field requires:
- A Google Cloud Project set up with billing enabled. (Create a Google Cloud Project).
- The following APIs enabled on the Google Cloud Project (Enabling an API in your Google Cloud Project)
- Maps JavaScript API
- Routes API
- An API key (Create Access Credentials)
If you use Google Address fields for the start or end location, make sure the Google Address field is also configured correctly.
To enter your Google API key into WS Form:
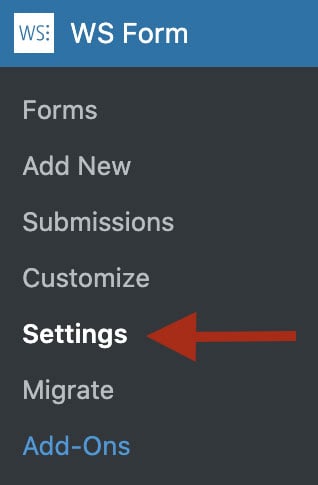
- Click Settings from the WS Form admin menu.
- Click the Advanced tab.
- Enter your API key into the API Key setting under Google.
- Choose Routes API (New) from the Routing API Version setting.
- Click Save.
If your Google API key has API restrictions enabled, make sure Routes API is included in the list of allowed APIs. Enabling Routes API on the Google Cloud Project alone does not give a restricted API key access to it.
If Google Address and Google Map fields are working but routing is not, check that Routes API is enabled and permitted for your API key. Routing uses a separate Google API.
If Routes API is blocked by your API key restrictions, Google may return a 403 API_KEY_SERVICE_BLOCKED error from routes.googleapis.com for ComputeRoutes.
If WS Form debugging is enabled, the following error will be shown:
Google Routing error: Routes API is not enabled for this API key. Enable Routes API in Google Cloud Console and add it to the API key restrictions.
After enabling an API or changing API key restrictions, wait a minute or two and then hard-refresh the page containing the form.
Once the key has been added and saved you can add the Google Routing field to your form.
Adding a Google Routing Field
To learn how to add, edit, clone, move, resize, offset, or delete a Google Routing field, please click here.
Templates
A good way of getting familiar with the Google Routing field is to try one of the ready-to-use templates. To use a template:
- Click Add Form from the WS Form admin menu.
- Choose one of the Google Routing templates: Simple, Map or Full.
Field Settings
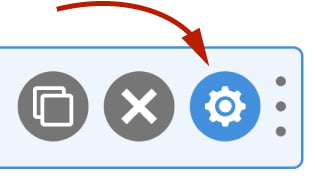
To edit the settings for this field type, click the settings icon on the field itself. Click the Save & Close or Save button to save your changes. If you do not want to save your changes, you can click the Cancel button or click any other form element to close the field settings sidebar.
Basic
The basic tab contains settings that the majority of WS Form users will need to control a field. The settings are as follows:
Label
This is the label shown alongside the field. As well as entering a label into this field, you can also double click the label of the field in the editor. You should enter an easy-to-understand label for your field, for example First Name or Email.
Show Label
If enabled the label will be shown on your form. If you do not want the label to appear for a particular field, uncheck this box.
Required
If checked, the Google Address field must be clicked on by the user.
Hidden
If checked the field will be hidden on the form. It can be shown again using conditional logic or your own JavaScript.
Help Text
The help text setting enables you to add smaller text under the field to assist the website visitor in completing that field.
WS Form variables can be entered into this field.
Route
Start
Choose a field to use for the start location. You can choose the follow field types:
When using a Google Address field the user can conveniently enter a partial address and then select a full address from a dropdown list. When both the start and end location are chosen, WS Form will make a request for the route. The Google Address field must be configured as described in the Google Address knowledge base article.
Other field types such as Text and Hidden can be used to allow a user to enter an address manually, or you can enter a fixed address to be used for either the start or end location.
Furthermore, other field types can also be populated with latitude and longitude values. They should be entered in the following format:
28.385233,-81.563873
A combination of Google Address and other field types can also be used.
End
Choose a field to use for the end location. See Start above for further details about this setting.
Field Mapping
Use this section to map the route components such as distance, duration and summary information to your form fields.
To map a field:
- Click the Add icon at the bottom right of the field mapping section.
- In the left-hand column, select the routing component.
- In the right-hand column, select your form field.
- Repeat this process for each address field on your form.
- Click the Save button at the bottom of the sidebar to save your changes.
Google address components can be mapped to the following field types:
Travel Mode
Choose which transportation mode to use when calculating the route. The available options are:
- Bicycling
- Driving (Default)
- Transit
- Walking
Unit System
When mapping text based components (e.g. Distance – Text) this setting determines which unit is used when displaying that text.
Avoid Highways
If checked, the routes between origins and destinations will be calculated to avoid highways where possible.
Avoid Tolls
If checked, the directions between points will be calculated using non-toll routes, wherever possible.
Avoid Ferries
If checked, the routes between origins and destinations will be calculated to avoid ferries where possible.
Google Map
Choose the Google Map field to show the route on. Your Google API key will require the Maps JavaScript API enabled on it.
Accessibility
ARIA Label
Accessible Rich Internet Applications (ARIA) defines ways to make web content and web applications more accessible to people with disabilities.
This setting enables you to define what text is made available to ARIA applications. This would, for example, provide a screen reader with specific text to read to someone with a disability.
The value of this setting defaults to your field label. If you would like to change this, enter a new value.
WS Form variables can be entered into this field.
Exclusions
Exclude From Emails
By default, WS Form uses the #email_submission variable in email templates. This provides a simple way of displaying all of the submitted fields in emails. Sometimes there might be a need to exclude a field from an email, for example, you might want to not include some introductory copy on a form, or hide a field you’re using with conditional logic to show or hide an element.
To hide a field from emails, check this box.
Other WS Form integrations may add exclusions in this section too, such as the WooCommerce integration which allows you to exclude certain fields from the cart entries.
Hidden Behavior
Always Include in Actions
This setting allows you to change the behavior of a field if the hidden setting is checked (See above), or if you set a field as hidden using conditional logic.
The normal behavior for a field that has been hidden is that it will not be included if an action has a Clear Hidden Fields setting enabled. For example, if you have a Send Email action, WS Form will not include fields that are hidden.
If this setting is checked, this field will always be included in actions if it is hidden.
Advanced
The advanced tab contains additional form attribute settings that provide further control over how a field is rendered.
Styles
Use the Styles settings to change the design of the Google Map field.
Label Position
There are five positions you can choose from for your label:
- Default
- Top
- Left
- Right
- Bottom
The default position will place the label set in the form settings advanced tab. For new forms this will be the Top positioning.
Note that when using some frameworks some label positions may not be available.
Label Width
If your label position is set to left or right, you can specify how wide the label will be. You can consider the overall width of the label and the field to be 12 columns (or whatever value is set in Form Settings). By default, labels are rendered at 3 columns wide (1/4 width), which means the field itself is 9 columns wide (3/4 width). You can change the width of the label using this setting.
To change the default width of all labels in your form:
1. Click the form settings icon. 2. Click the Advanced tab. 3. Scroll down to Default Label Width and change the setting. 4. Click Save at the bottom.
Vertical Alignment
The vertical alignment option allows you to choose how this field will be vertically aligned in relation to fields in the same row. The options are:
- Top
- Middle
- Bottom
Classes
For developers WS Form allows you to add your own classes to fields.
Field Wrapper
The wrapper CSS class setting enables you to add a class (or classes) to a field wrapper. Field wrappers are sections of HTML added around a field to position them on the page. To add multiple classes, add a space between the class names.
Field
To add a class to the actual field element itself, enter a class (or classes) to this setting. To add multiple classes, add a space between the class names.
Restrictions
User Status
Choose from one of the options to filter which user status can see this field:
- Any
- Is Logged In
- Is Logged Out
- Has User Role or Capability
If you choose Has User Role or Capability, additional settings will appear that enable you to choose one or more roles or capabilities.
Validation
Show Invalid Feedback
Invalid feedback text is shown when a form is saved or submitted, and the field has not been completed according to the field settings you have configured. For example if the minimum character count is 10 and you enter 5 characters and then submit the form, the field will be deemed invalid. If this setting is checked, invalid feedback is shown under the field.
Invalid Feedback Text
WS Form automatically builds invalid feedback text for all of your fields. If no text is entered into this field, the value shown in the field in light gray text will be shown. If you would like to specify alternative invalid feedback text, you can enter it within this setting.
WS Form variables can be entered into this field.
Custom Attributes
This setting is used to add custom attributes to the HTML of this field, such as data-my-attribute="1234". You can add as many custom attributes as you need.
To add a custom attributes key value pair:
- Click the Add icon to add a custom attribute row.
- Enter the key in the left column.
- Enter the value in the right column.
- Click Save to save the custom attributes.
Breakpoints
The breakpoint settings define the width of a field and also what the offset (how many columns from the left-hand side of the form or the previous field) of a field is for each breakpoint. For more information about the breakpoint settings and capabilities of WS Form, click here.