
The Media Capture field allows you to capture video, photo and audio and upload them with your form submission. When the form is submitted, media captures can be saved to submissions, attached to emails or mapped to integrations where supported. It can also be used to read QR codes in photo mode on compatible devices.
Demo
No media is sent to our server in this demo.
Adding a Media Capture Field
To learn how to add, edit, clone, move, resize, offset, or delete a file upload field, please click here.
Field Settings
To edit the settings for this field type, click the settings icon on the field itself. Click the Save & Close or Save button to save your changes. If you do not want to save your changes, you can click the Cancel button or click any other form element to close the field settings sidebar. 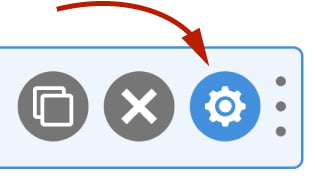
Basic
The basic tab contains settings that the majority of WS Form users will need to control a field. The settings are as follows:
Label
This is the label shown alongside the field. As well as entering a label into this field, you can also double click the label of the field in the editor. You should enter an easy-to-understand label for your field, for example, Record a Video or Take a Photo.
Show Label
If enabled the label will be shown on your form. If you do not want the label to appear for a particular field, uncheck this box.
Required
If checked this field will be required when the website visitor completes your form. Failure to complete the field if this is checked will result in a validation message appearing under the field prompting the user to complete the field correctly.
Required fields are indicated on your website with the word Required being adding to the label of the field. This can be changed in the form settings advanced tab.
Hidden
If checked the field will be hidden on the form. It can be shown again using conditional logic or your own JavaScript.
Help Text
The help text setting enables you to add smaller text under the field to assist the website visitor in completing that field.
In addition to inserting plain text, WS Form can also display character and word count information in this field.
WS Form variables can be entered into this field.
Capture Settings
Capture Mode
Choose whether this field should capture video, photos or audio.
Camera Facing Mode
Only for Photo or Video capture mode on mobile devices.
When capturing photos or video on a mobile device, this setting determines which camera is used by default. Options are:
- Front Camera (User)
- Rear Camera (Environment)
Note: You cannot use the front and rear cameras simultaneously. If you have more than one media capture field on your form, ensure they are both using the same facing mode.
Auto Start Devices
For security, browsers do not allow access to the camera and microphone by default. By default, WS Form does not request camera or microphone access by default and instead politely asks the user to start the camera and/or microphone. If you would like to bypass this and immediately ask for permission to use the users media capture devices, check this setting.
Resolution
Only for Photo or Video capture mode.
By default, WS Form will capture photos or video using the cameras default setting. You can override this using this setting. Available settings are:
- 480p SD (640 x 480)
- 720p HD (1280 x 720)
- 1080p Full HD (1920 x 1080)
- 1440p 2K (2560 x 1440)
- 2160p 4K (3840 x 2160)
Note that not all devices support all of these resolutions.
Auto Hide Controls
For better accessibility, WS Form ensures the media capture controls are always visible. If you would like to auto hide the controls you can enable this setting.
Maximum Duration
Only for Audio or Video capture mode.
Enter the maximum duration of the audio or video capture.
Countdown
Enable
Check this if you would like to enable a countdown prior to an audio, photo or video being captured.
Duration
Choose the number of seconds to count down before capturing starts.
Beeps
To enable an audible beep during the countdown, check this setting.
Audio Settings
Format
Choose the format for the captured audio. Options include:
- MP4
- OGG
- WAV
- WEBM
Photo Settings
Format
Choose the image format for the captured photo. Options include:
- JPEG
- PNG
- WEBP
Quality
Choose the quality of the capture photo.
Sound Effect
If checked, a camera shutter sound effect will play when the photo is captured.
Video Settings
Format
Choose the video format for the captured video. Options include:
- MP4
- WEBM
QR Codes
QR code functionality is only available when Capture Mode setting is set to Photo.
This functionality is only available in certain browsers that support the BarcodeDetector interface.
Enable
When enabled, the Media Capture field will check for QR codes in the photo preview. When found, the value of the QR code will be injected into the field specified in the Field setting.
Field
Choose which field to inject the QR code value into. The following field types can be chosen:
Overlay
If checked, a capture area overlay will be applied to the photo preview to encourage efficient positioning of a QR code for reading.
Beep
If enabled a beep will sound when a QR code is detected and read.
File Handler
File handlers in WS Form determine the final destination of uploaded files when the form is submitted. You can specify different destinations for each file field on your form. This means you could have one field that saves files to a public location, and another that saves to a private location.
Save To
Use this setting to determine the final destination of the uploads files for this field when the form is submitted.
| Save To | Public | Media Library | Description |
|---|---|---|---|
| WS Form (Private) | No | No | This is the default handler. This handler saves file uploads in a protected hash format. These uploads are only accessible from within the WordPress admin. |
| WS Form (Public) | Yes | No | This handler saves file uploads in a format that can be accessed publicly. |
| Media Library | Yes | Yes | This handler saves file uploads to the WordPress Media Library. |
WS Form also has file handlers for:
Saved File Name
By default WS Form will save files using their uploaded file name.
The Saved File Name setting allows you to specify a custom file name mask for the saved file. The mask can include the following variables as well as WS Form variables, e.g. #field(123).
| Variable | Description |
|---|---|
#file_basename |
Original file name (e.g. file.jpg). |
#file_filename |
File name without extension (e.g. file). |
#file_extension |
File name extension (e.g. jpg). |
#file_index |
File upload index (e.g. 1). If you have enabled the Multiple setting, this will return the file index. If the Multiple setting is enabled and you exclude #file_index, WS Form will append this to your mask automatically. |
Other commonly used variables in file name masks include:
| Variable | Description |
|---|---|
#field(123) |
Returns the value of a field submitted in the form. Change 123 to match the ID of your field. |
#submit_id |
Returns the submission ID (Requires a Save Submission action) |
File names are sanitized prior to files being saved for security reasons.
Example Masks
Single Media Capture: custom-#submit_id-#file_filename.#file_extension
Multiple Media Capture: custom-#submit_id-#file_filename-#file_index.#file_extension
Use WordPress Upload Path (DropzoneJS type only)
By default, files uploaded using DropzoneJS will be saved to the path:
uploads/ws-form/#form_id/ dropzonejs/#field_id/#file_name
This is done to ensure scratch files (i.e. files that are uploaded prior the form being submitted) do not clog up your normal uploads path. Files are retained in this path after they are committed to the Media Library.
If you would prefer for scratch and submitted files to be added to the normal WordPress uploads path, check this box. This path is normally:
uploads/#year/#month/#file_name
Note that this path is subject to change if WordPress admin settings are changed or a filter hook is used.
The upload path can also be controlled with the WS Form wsf_dropzonejs_upload_path filter hook.
Accessibility
ARIA Label
Accessible Rich Internet Applications (ARIA) defines ways to make web content and web applications more accessible to people with disabilities.
This setting enables you to define what text is made available to ARIA applications. This would, for example, provide a screen reader with specific text to read to someone with a disability.
The value of this setting defaults to your field label. If you would like to change this, enter a new value.
WS Form variables can be entered into this field.
Exclusions
Exclude From Emails
By default, WS Form uses the #email_submission variable in email templates. This provides a simple way of displaying all of the submitted fields in emails. Sometimes there might be a need to exclude a field from an email, for example, you might want to not include some introductory copy on a form, or hide a field you’re using with conditional logic to show or hide an element.
To hide a field from emails, check this box.
Other WS Form integrations may add exclusions in this section too, such as the WooCommerce integration which allows you to exclude certain fields from the cart entries.
Hidden Behavior
Always Include in Actions
This setting allows you to change the behavior of a field if the hidden setting is checked (See above), or if you set a field as hidden using conditional logic.
The normal behavior for a field that has been hidden is that it will not be included if an action has a Clear Hidden Fields setting enabled. For example, if you have a Send Email action, WS Form will not include fields that are hidden.
If this setting is checked, this field will always be included in actions if it is hidden.
Advanced
The advanced tab contains additional form attribute settings that provide further control over how a field is rendered.
Styles
Use the Styles settings to change the design of the file upload field.
Label Position
There are five options you can choose from for positioning your label:
- Default
- Top
- Left
- Right
- Bottom
The default position will place the label set in the Form Settings advanced tab. For new forms, this will be the Top positioning.
Note that when using some frameworks, some label positions may not be available.
Vertical Alignment
The vertical alignment option allows you to choose how this field will be vertically aligned in relation to fields in the same row. The options are:
- Top
- Middle
- Bottom
Classes
For developers WS Form allows you to add your own classes to fields.
Field Wrapper
The wrapper CSS class setting enables you to add a class (or classes) to a field wrapper. Field wrappers are sections of HTML added around a field to position them on the page. To add multiple classes, add a space between the class names.
Restrictions
Field restrictions enable you to define what can or cannot be entered into the field.
Disabled
If checked the field will be disabled, and it cannot be interacted with. You can re-enable a field dynamically by using conditional logic.
User Status
Choose from one of the options to filter which user status can see this field:
- Any
- Is Logged In
- Is Logged Out
- Has User Role or Capability
If you choose Has User Role or Capability, additional settings will appear that enable you to choose one or more roles or capabilities. If checked the field will be disabled, and it cannot be interacted with. You can re-enable a field dynamically by using conditional logic.
Labels
Use these settings to customize or translate the media capture labels.
Validation
Show Invalid Feedback
Invalid feedback text is shown when a form is saved or submitted and the field has not been completed according to the field settings you have configured. For example if the minimum character count is 10 and you enter 5 characters and then submit the form, the field will be deemed invalid. If this setting is checked, invalid feedback is shown under the field.
Invalid Feedback Text
WS Form automatically builds invalid feedback text for all of your fields. If no text is entered into this field, the value shown in the field in light gray text will be shown. If you would like to specify alternative invalid feedback text, you can enter it within this setting.
WS Form variables can be entered into this field.
Custom Attributes
This setting is used to add custom attributes to the HTML of this field, such as data-my-attribute="1234". You can add as many custom attributes as you need.
To add a custom attributes key value pair:
- Click the Add icon to add a custom attribute row.
- Enter the key in the left column.
- Enter the value in the right column.
- Click Save to save the custom attributes.
Breakpoints
The breakpoint settings define the width of a field and also what the offset (how many columns from the left-hand side of the form or the previous field) of a field is for each breakpoint. For more information about the breakpoint settings and capabilities of WS Form, click here.